We hope you love the products we recommend and just so you know that as an Amazon Associate MyLogSplitter may earn from qualifying purchases.
Important: this is a craft / prop guide. A wooden battle axe is not a real tool for chopping or fighting. If you build one, treat it like a prop, and follow safe workshop practices when cutting/sanding/drilling.
Table of Contents
Quick overview (7 steps)
- Choose wood (plywood is easiest for a prop head).
- Draw your template and transfer to the wood.
- Cut the head shape.
- Shape/sand edges for the look you want.
- Make the handle (dowel/straight stick, or a shaped handle).
- Join head + handle securely (wood glue + fasteners as needed).
- Finish (paint/stain/seal).

Video: wooden battle axe prop build

Materials and tools
- Wood (plywood or hardwood board)
- Hand saw or jigsaw
- Sandpaper (coarse to fine)
- Wood glue, screws/dowels (optional reinforcement)
- Paint/stain + clear sealant (optional)
Step-by-step
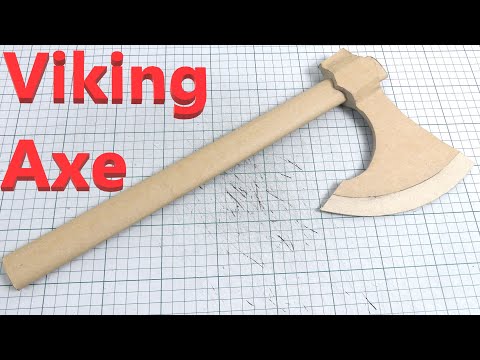
Step 1: Template
Draw the axe head on paper/cardboard first, then trace onto the wood. This keeps your cuts clean and symmetrical.
Step 2: Cut the head
Cut outside the line, then sand down to your final shape. Wear eye protection, and clamp the workpiece.
Step 3: Shape and sand
Round edges for a prop look. Do not create a sharpened edge (keep it blunt).
Step 4: Handle
A straight dowel works for many props. For a more realistic look, shape a handle from hardwood and sand smooth.
Step 5: Assemble
Use wood glue and mechanical reinforcement if needed (screws/dowels). Let glue cure fully before handling.
Step 6: Finish
Paint/stain, then seal. If you plan to carry it outdoors, sealing helps it last longer.
Alternative: cardboard axe
If you want something lighter (and safer for cosplay/props), cardboard can work well.