Tag: wood chopping

  • How to Sharpen an Axe – How to achieve a Razor Sharp Axe

    How to Sharpen an Axe – How to achieve a Razor Sharp Axe

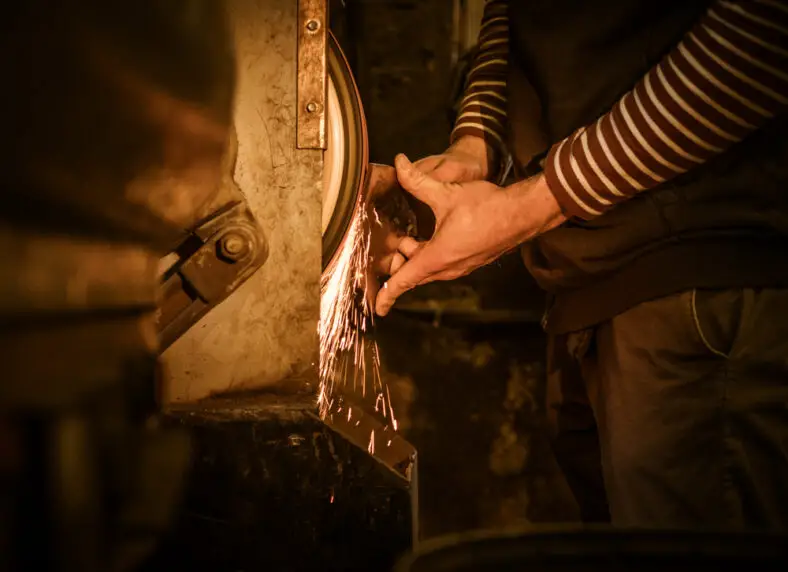
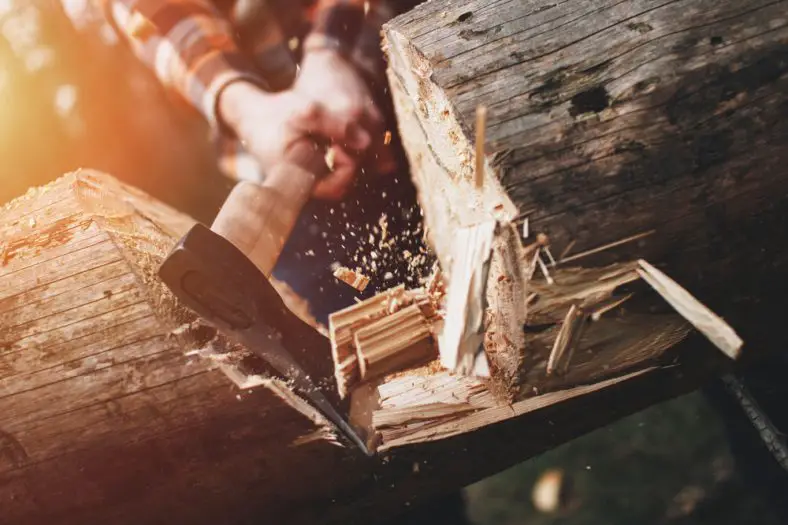
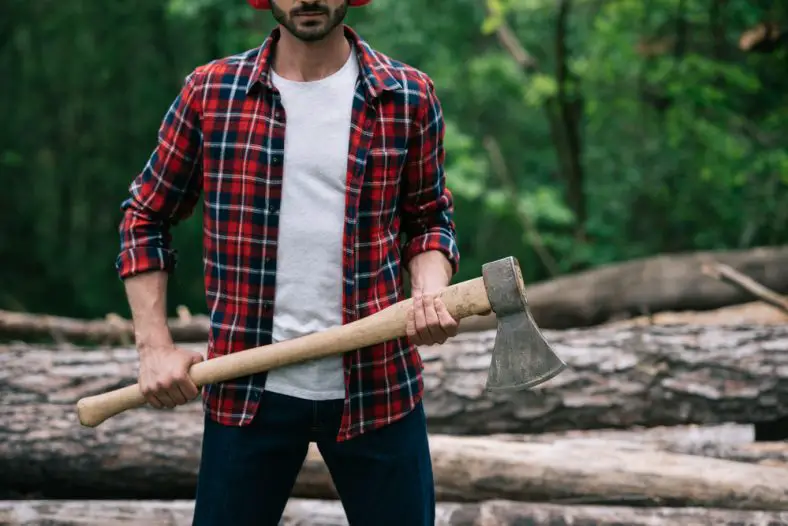
    Hey there, this is Jim ‘The Lumberjack’.

    I’m here to teach you how to sharpen an axe, a key skill that’ll make your outdoor work a lot more efficient.

    No need to wrestle with a dull edge when a bit of elbow grease and know-how can have your axe cutting clean and true. It’s all about taking your time, using the right tools, and following the grain of good sense – just like splitting a seasoned log.

    So roll up your sleeves, folks, and let’s get to it—because there’s nothing quite like the feel of a well-sharpened axe in your hands.

    How to sharpen an axe - A quick Guide to results

    Common Mistakes in Axe Sharpening: What to Avoid

    As with anything, how to sharpen an axe can have its pitfalls. Here are a few you’d do well to avoid:

    • Sharpening your axe when it’s not needed: An axe isn’t like a razor; it doesn’t need to be hair-splitting sharp. Over-sharpening can actually weaken the edge and increase the need for more frequent maintenance.
    • Ignoring the angle: The bevel angle is crucial when sharpening an axe. Too steep, and you’ll end up with a durable but dull edge. Too shallow, and you’ll get a sharp but fragile edge that chips easily.

    Rushing the Process: Why Patience is a Virtue in Axe Sharpening

    Don’t rush when you’re sharpening an axe. You’re not just honing metal; you’re crafting an edge. The process takes time, and each step needs to be done carefully and precisely. The end result is worth the extra attention to detail.

    How to Sharpen an Axe or Hatchet

    Wrong Tool, Wrong Time: Choosing the Correct Sharpening Tool

    Image Description: A diagram showing the main points on an axe.
Creator: RainbowRed
Source: Wikipedia
License: Free Art License

    One of the biggest mistakes in how to sharpen an axe is using the wrong tool at the wrong time. Here’s a basic guide:

    • Filing: This is for when your axe edge is significantly dull or has nicks. A file removes more material and can quickly reshape the edge.
    • Sharpening stone: Once your edge is shaped, the stone refines it, removing the scratches left by the file and honing a sharper edge.
    • Strop: This is the final touch. It aligns any leftover microscopic burrs, giving your axe that razor-sharp edge.

    Over-sharpening: A Surprising Mistake

    The goal of axe sharpening isn’t to get the sharpest edge possible; it’s to get the sharpest edge that will last. Over-sharpening can lead to an edge that’s razor sharp but brittle and more prone to chipping or rolling.

    Maintaining Your Axe’s Edge: Post-Sharpening Care

    Just as important as the sharpening process is taking care of the axe afterwards. Here are some tips to help your axe stay sharp longer:

    • Clean your axe after use: Simple, but crucial. Dirt and moisture are the enemies of your axe edge.
    • Oil the axe head: This prevents rust and keeps your axe in top condition.
    • Store your axe properly: Keep it somewhere dry, and cover the edge to protect it.

    Proper Cleaning: Protecting Your Axe after Sharpening

    After you’ve spent all that time sharpening, don’t let your hard work go to waste. Cleaning off any leftover metal filings and applying a light coating of oil protects your axe from rust and helps maintain the edge.

    Storing Your Axe: Where and How to Keep Your Axe

    Your axe isn’t a toy and shouldn’t be left lying around.

    An axe rack or magnetic tool bar is a good option for storing your axe. This keeps the axe edge from coming into contact with anything that might dull it.

    Expert Tips: Elevate Your Axe Sharpening Skills

    By now, you’re probably starting to feel like a bit of an expert yourself, but here’s a couple more tips on how to sharpen an axe to really up your game:

    • Always maintain control: Keep your sharpening tools and the axe steady when sharpening. Any slipping can result in an inconsistent edge or even an injury.
    • Don’t forget the handle: While the axe head gets all the attention, a good handle is just as important for effective axe use.
    how to sharpen an axe and maintain it so that it stays sharp

    Sharpening Angles: Finding the Sweet Spot

    Every axe and usage has its ideal sharpening angle, and finding this is more of an art than a science. A general guideline is 25-30 degrees for a chopping axe, and 20-25 degrees for a carving or splitting axe. Remember, the steeper the angle, the more durable but less sharp the edge will be.

    Reading the Burr: Advanced Axe Sharpening Tips

    After using your sharpening stone, run your fingers carefully along the edge of the axe. You should be able to feel a slight burr or lip of metal. This indicates that the edge is fully sharpened. Once you feel this burr along the entire edge, it’s time to stop sharpening and start honing.

    Regular Maintenance: Keeping Your Axe Sharp

    Regular maintenance is the key to keeping your axe sharp and ready for action. Don’t wait for your axe to become dull before you decide to sharpen it.

    A quick touch up after each use can make a big difference and prolong the periods between full sharpening sessions.

    The Journey to Axe Sharpening Mastery

    Sharpening an axe is as much about the journey as the destination. As you spend time with your axe, getting to know its quirks and temperaments, you’ll find yourself becoming more in tune with it. It becomes not just a tool, but an extension of yourself. So, remember, keep your axe sharp and it’ll never let you down. And whenever you hear the question, “how to sharpen an axe,” you’ll always have a story to tell.

  • How to Use an Axe. A No Nonsense Guide to NOT Bleeding Out.

    How to Use an Axe. A No Nonsense Guide to NOT Bleeding Out.

    We hope you love the products we recommend and just so you know that as an Amazon Associate MyLogSplitter may earn from qualifying purchases.

    Quick answer (dont get hurt)

    • Wear eye protection, sturdy boots, and gloves.
    • Work on a stable chopping block, with a clear swing radius (no people, pets, or clutter).
    • Use the right tool: hatchet for kindling, axe for chopping, maul for splitting rounds.
    • Keep the blade sharp (a dull axe is more dangerous because it glances off wood).

    Splitting wood regularly? See: How to split wood by hand or skip the swing and start with best log splitters (guide).

    Choose the right axe for the job

    • Hatchet: small wood, kindling, light camp chores.
    • Felling axe: chopping across grain, limbing, and tree work (advanced and risky).
    • Splitting axe/maul: splitting rounds with the grain (mauls are heavier and more forgiving).

    Set up a safe work area

    • Use a solid block or stump, on level ground.
    • Keep the swing area clear in every direction.
    • Make sure the wood is stable (no rocking rounds).

    Grip and stance basics

    • Feet about shoulder width apart, knees slightly bent.
    • For power swings, one hand near the end of the handle, the other closer to the head to guide. Hands slide together during the swing.
    • Do not swing wildly behind your head. Controlled, repeatable swings are safer and more accurate.

    Common problems (and what to do)

    Glancing blows

    Usually caused by poor aim or a dull edge. Stop, reset your stance, and sharpen if needed.

    Axe stuck in the wood

    Do not yank violently. Keep stable footing and pull straight. If needed, lift the wood and tap it on the block to free the head safely.

    Care and storage

    • Wipe down after use, especially if you hit wet/dirty wood.
    • Keep the edge touched up, and use a sheath to protect the bit.
    • Store dry to prevent rust and handle damage.

    Bottom line

    An axe is simple, but not forgiving. If you keep the edge sharp, the work area clear, and your swings controlled, youll get better results with less risk.

  • Using a Log Splitter Vs Splitting by Hand: How to Split Wood Efficiently!

    Using a Log Splitter Vs Splitting by Hand: How to Split Wood Efficiently!

    As the golden hour paints the sky and you’re lookin’ at a heap of logs needing splitting, a thought might cross your mind – should you be using a log splitter vs splitting by hand?

    Well now, it’s not a one-size-fits-all answer, I’m afraid. Depends on a whole host of things.

    Let’s dive deeper into this, comparing the ins and outs of using a log splitter versus hand splitting.

    Why It Matters

    Splitting logs is essential for creating usable firewood, be it for your fireplace, campfire, or BBQ. The two primary ways of splitting logs are using a log splitter or doing it manually. Each method has its pros and cons – but there is no secret to splitting logs.

    Log Splitting Methods

    The Log Splitter

    using a log splitter vs splitting by hand? - This guy prefers his log splitter!

    A log splitter is a machine that uses electricity or gas to split logs. Log splitters can be manual, requiring physical force to operate, or hydraulic, which do the heavy lifting for you.

    Hand Splitting

    Hand splitting is the traditional method of splitting logs. It requires an axe or a maul and some muscle power. It can be physically demanding but also rewarding.

    Comparing Log Splitter and Hand Splitting

    Here’s a handy table that compares log splitters and hand splitting:

    Log SplitterHand Splitting
    EfficiencyHighLow
    Physical EffortLowHigh
    Initial CostHighLow
    Maintenance CostHighLow
    SafetyHigh (if used correctly)Medium (depends on technique)
    Environmental ImpactMedium to High (depends on power source)Low

    Safety and Environmental Impact

    Both methods require safety precautions. Log splitters require proper operation and hand splitting requires good technique and protective gear.

    In terms of environmental impact, hand splitting is greener because it only uses human energy. Log splitters, particularly gas-powered ones, have a higher carbon footprint.

    Choosing the Right Method for Your Situation

    Whether you choose a log splitter or hand splitting depends on your situation.

    • Home Use: If you have a small amount of wood, hand splitting could work. For larger piles, a log splitter is more efficient.
    • Professional Use: In commercial settings, a log splitter is usually better due to its speed and efficiency.
    • Occasional Use: For occasional use, like camping trips, hand splitting with an axe or maul is often enough.

    Tips for Both Methods – using a log splitter vs splitting by hand?

    Whether you’re using a log splitter or hand splitting, there are ways to improve your efficiency. Regular maintenance of your log splitter and honing your hand splitting technique can make the process smoother and more effective.

    What is the most effective way to split wood?

    The most effective way to split wood largely depends on your individual needs and resources. If efficiency and time-saving are paramount, using a hydraulic log splitter is often the most effective. It leverages mechanical force to split logs, requiring less physical exertion. However, for occasional use, smaller quantities, or to enjoy the traditional art of wood splitting, manual splitting using a maul or an axe can be equally effective.

    Is a manual log splitter worth it?

    The worth of a manual log splitter is contingent upon your specific requirements. Manual log splitters, compared to hydraulic ones, are less expensive, require no fuel, and are more portable. They are a good choice for those who don’t frequently need to split large volumes of wood, who value the physical exercise, or who want a quieter, more eco-friendly option. But, if you regularly deal with substantial amounts of hardwood, the speed and efficiency of an hydraulic or gas-powered splitter may justify its cost.

    Is it hard to split wood by hand?

    Splitting wood by hand can indeed be a challenging task, especially for beginners. It requires physical strength, endurance, and proper technique to be done efficiently and safely. However, like any skill, the difficulty decreases with practice and improved technique. Furthermore, using the right tools – like a well-balanced splitting axe or maul – can significantly reduce the hardship of the task.

    What is the best way to split logs by hand?

    The best way to split logs by hand is by following proper technique and safety precautions. Here’s a simple guide:
    Select the right tool: A splitting axe or a maul is typically used for this task. These tools are designed with a wider edge to help split the wood fiber.
    Position the log: Place the log you want to split on a sturdy, flat surface. An old tree stump is often used.
    Aim for the edges: Rather than aiming for the center, aim for the edges of the log. Hitting at the edge often causes the log to split more easily.
    Use the right technique: Stand with your feet shoulder-width apart. Hold the handle of the tool with both hands – one near the top of the handle and the other at the bottom. Lift the tool over your head and bring it down in a swift, controlled motion.
    Safety first: Always wear safety glasses and sturdy boots. Be aware of your surroundings to ensure that people and pets are at a safe distance. Remember, like any physical skill, proficiency comes with practice. Start with smaller logs and work your way up as you gain confidence and skill.

    Final Thoughts

    Choosing between using a log splitter vs splitting by hand is all about assessing your needs. Both methods have their place, and both can be effective when used properly. As long as you prioritize safety and efficiency, you can’t go wrong.

    Further Reading and Resources

    Want to learn more about log splitting? There are plenty of resources online, including forums, instructional videos, and training courses. The world of log splitting is wide open for exploration.

    Enjoy the journey!