Category: Yard Equipment

  • Which Stihl Chainsaw is Best For Me? An In-Depth Guide

    Which Stihl Chainsaw is Best For Me? An In-Depth Guide

    Finding the answer to the question, “Which Stihl chainsaw is the best for me?” is a journey that requires careful thought and evaluation. The Stihl brand stands tall in the market for its consistent delivery of high-quality, resilient, and multipurpose chainsaws.

    Given the vast range of options, the selection process might seem daunting, but this comprehensive guide will steer you toward the ideal Stihl chainsaw that aligns with your needs and preferences.

    Recognizing Your Chainsaw Usage Needs – Which Stihl Chainsaw is Best For Me?

    Identifying Your Chainsaw Requirements: Home Use Vs. Professional Applications

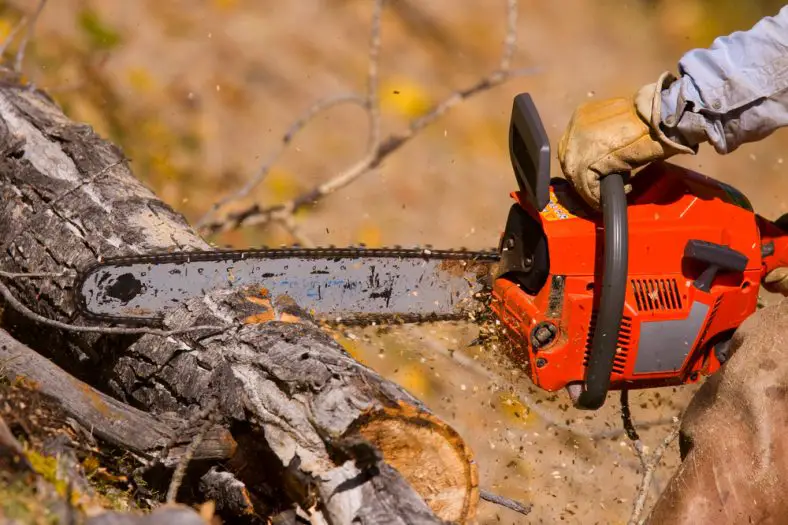
    The first step toward answering “Which Stihl chainsaw is best for me?” lies in identifying your specific requirements. The frequency and type of usage determine the kind of chainsaw that best suits your needs, whether you’re a homeowner engaging in occasional DIY projects or a professional lumberjack managing significant forestry tasks.

    Which Stihl Chainsaw is Best For Me? - So many Stihl options

    For example, if you’re a farmer handling vast land and regularly felling trees and chopping firewood, your needs may warrant more than one chainsaw with varying capacities. Conversely, if your use is limited to periodic pruning and trimming tasks in your backyard, a compact, lightweight model will suffice.

    Comparison Table of Different Stihl Chainsaw Models

    ModelEngine Power (KW)Recommended Guide Bar Length (inch/cm)Weight (kg)Ideal For
    MS-1701.2 KW12″-16″/30-40cm4.1 kgLight garden work, pruning, trimming
    MS-1801.4 KW12″-16″/30-40cm4.2 kgSmall to medium tree cutting, firewood preparation
    MS-2613.0 KW16″-20″/40-50cm4.9 kgMedium to large tree cutting, firewood cutting
    MS-6615.4 KW20″-28″/50-70cm7.4 kgLarge tree cutting, professional forestry work

    Key Specifications in Stihl Chainsaw Selection

    Significance of Power, Bar Length, and Weight

    To make an informed Stihl chainsaw choice, it’s crucial to understand key chainsaw specifications, such as:

    • power
    • bar length
    • weight

    Chainsaws with high power and longer guide bars are designed for larger, more intensive tasks, while smaller, lightweight models are well-suited for small to medium tasks and tend to be easier to handle and maneuver.

    Stihl’s Advanced Chainsaw Technologies Across Models

    Stihl’s reputation in the chainsaw market extends beyond powerful engines and exceptional cutting capacity. The company’s commitment to revolutionizing chainsaw technology is evident in the range of advanced features they’ve incorporated into various models. Here’s a closer look at the distinct technologies available and the models that feature them:

    ErgoStart (E):

    The ErgoStart system, often indicated with an ‘E’ in the model name, is designed to make starting Stihl chainsaws practically effortless. This technology reduces the strain on the user’s body and ensures smooth, jerk-free startups.

    Some Stihl chainsaw models equipped with the ErgoStart system include:

    • MS 180 C-BE – This model is a homeowner favorite, offering ErgoStart alongside its 1.4 KW power engine and 16″ guide bar, perfect for cutting firewood and handling light to medium tree cutting tasks.
    • MS 251 C-BE – This model is an excellent choice for heavier homeowner use or light professional use, boasting a 2.2 KW engine power, a guide bar length recommendation of 16″-18″, and the ErgoStart system for easy handling.
    • MS 362 C-M – A professional-class chainsaw with M-Tronic engine management and ErgoStart. This model has a 3.5 KW engine power and can handle a guide bar length of up to 25″.

    Quick Chain Tensioning (B):

    Quick Chain Tensioning, often indicated with a ‘B’ in the model name, is an innovative feature that enables quick and easy tensioning of the chainsaw’s chain. This feature eliminates the need for tools when adjusting the chain tension, thereby enhancing convenience and user safety.

    Chainsaws equipped with Quick Chain Tensioning include:

    • MS 171 C-BE – This model is suitable for lighter tasks around the house, like pruning and trimming. It’s equipped with a 1.3 KW engine and is recommended for a 14″-16″ guide bar length.
    • MS 211 C-BE – This mid-range model comes with a 2.3 KW engine and a recommended guide bar length of 16″-18″. It’s a practical choice for homeowners needing a bit more power for medium tree cutting or firewood preparation.
    • MS 250 C-BE – This powerful chainsaw comes with a 2.3 KW engine, ideal for tasks that require a bit more grunt, such as larger tree felling and firewood cutting. It can accommodate a guide bar length of up to 18″.

    It’s worth noting that many Stihl chainsaw models often feature both technologies, as indicated by ‘C-BE’ in the model name. This combination of advanced features enhances user experience by offering an easy-to-start and simple-to-maintain chainsaw.

    Making Your Stihl Chainsaw Choice

    Optimal Recommendations for Varied User Needs

    The best Stihl chainsaw for you hinges largely on your specific requirements and expectations. If you prioritize ease of use and mobility without the concerns of fuel storage, a battery-powered Stihl chainsaw would be an excellent choice. However, if you need to undertake demanding tasks that necessitate continuous power, a petrol-driven chainsaw would be more appropriate.

    Caring for Your Stihl Chainsaw

    Essential Chainsaw Maintenance Practices

    Investing in a Stihl chainsaw is only the first step in ensuring seamless, efficient work. The durability and long-term performance of your tool heavily depend on how you take care of it. Even the finest chainsaw needs regular upkeep to maintain its functionality.

    Regular Inspection and Cleaning

    The first and foremost step to keeping your Stihl chainsaw in tip-top condition is regular inspection and cleaning. Ensure that there’s no dust, dirt, or debris lodged in the chainsaw components, as this can result in reduced performance and premature wear. Make it a routine to clean your chainsaw after every use. Remember to disconnect the chainsaw from its power source before starting any cleaning process to avoid accidental startup.

    Chain Sharpening

    A chainsaw is only as good as its cutting edge, making chain sharpening a critical aspect of chainsaw maintenance. Dull chains not only make your work harder but also put unnecessary strain on the chainsaw engine, leading to faster wear and tear. It’s advisable to sharpen the chains regularly, based on the frequency of use and the type of material you’re cutting. Stihl offers a range of filing tools and guides to help you maintain the sharpness of your chainsaw blades.

    Guide Bar Oiling

    The guide bar on your chainsaw needs regular oiling to reduce friction between the chain and the bar, allowing smoother operation. Stihl chainsaws are equipped with automatic oiling systems, but it’s essential to check and refill the oil reservoir as needed. Use high-quality bar and chain oil for optimum performance and longevity.

    Air Filter Maintenance

    Your chainsaw’s air filter plays a critical role in keeping the engine clean by preventing dust, dirt, and other particles from entering it. A dirty or clogged air filter can lead to poor engine performance and increased fuel consumption. Stihl chainsaws feature easily accessible air filters, making cleaning or replacement a straightforward process. Regularly inspect and clean the air filter, especially if you’re working in dusty environments.

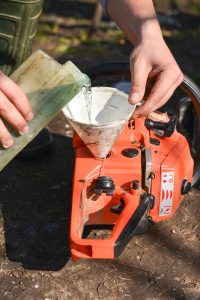
    Fuel and Oil Mixture

    If you’re using a gasoline-powered Stihl chainsaw, it’s crucial to use the correct fuel-to-oil ratio as recommended by Stihl. An incorrect mixture can lead to engine damage or inefficient operation. Always use fresh fuel and high-quality two-stroke engine oil.

    Regular Servicing

    In addition to these user-maintainable aspects, your Stihl chainsaw will benefit from regular professional servicing. Stihl dealers and service centres are equipped to perform detailed inspections, replace worn parts, and conduct fine-tuned adjustments to ensure your chainsaw continues to perform at its peak.

    Overall, maintaining your Stihl chainsaw involves a combination of daily checks, periodic user maintenance, and professional servicing. Proper care and attention not only extend your chainsaw’s lifespan but also ensure safer operation and superior performance.

    Final Thoughts

    In conclusion, the diversity of Stihl chainsaw models offers something for everyone, from casual backyard gardeners to professional foresters. Recognizing your chainsaw needs and understanding the different chainsaw specifications will empower you to select the ideal Stihl chainsaw model. Hopefully we have helped you today to work out which Stihl chainsaw is best for me?

  • Gorillabac Log Lifter – Log Lift Crane Review

    Gorillabac Log Lifter – Log Lift Crane Review

    I still remember that gut-wrenching feeling when I knew something wasn’t right.

    I was lifting a large wooden stage to put it in storage, and I felt something give above my groin…

    It turned out to be a double hernia, and boy was it painful – and I was so limited in what I could do until I could get the surgery done.

    Being careful is still important to me when working in the yard because I don’t want that experience again.

    Maybe you can relate?

    The Gorillabac Log lifter is a seriously great tool, particularly if you’ve had back troubles or hernia issues. It’s definitely not perfect in every way, but if used correctly, it could just save you a trip to the ER.

    According to the Gorrilabac website:

    “Gorillabac is the only log splitter, pickup truck or ATV attachment log crane that will Pull, Lift, Position and Hold logs for wood splitting or loading.”

    Gorillabac

    Some of the functions of the Gorillabac Log Lifter include:

    1. Retrieving oversized logs out of the woods
    2. Lifting logs
    3. Positioning logs onto the log splitter beam – ready for splitting, or a truck bed for transport to your splitter
    4. Holding logs in position while cutting or splitting

    Whether working alone or with someone, Gorillabac improves Safety, Efficiency, Wood Yield, and (in my humble opinion) Fun!

    Let a gorilla do the work.

    Stop working on your knees or crouching over splitting big logs in the vertical position. Stop the repetitive lifting and twisting and poor ergonomic positions. With Gorillabac you manage the wood at waist level and no longer need to struggle rolling logs and lifting and holding.

    Assembly of the Gorrilabac Log Lifter

    Assembly is particularly easy. It only takes about 20-30 minutes to put all the pieces together.

    I found that getting close to the rounds that need split and rolling them close enough to use the lift was a lot more effective.

    After you split a big round you can just swing the other section out of your way until you get the other side split up too.

    Receiver Hitch Hoist to Pull Logs to the Truck

    Slow as far as pulling a log to the truck or splitter but makes the work so much easier.

    Pickup Truck Crane, receiver hitch hoist demonstration with Gorillabac log Splitter lift attachment.

    Gorrillabac Log Lifter – Lift Arm Attachment to Log Splitter

    Demonstration of Gorillabac log splitter lift arm equipment Patented 9802800, 9150387

    The wife and I split about two cords yesterday. She ran the splitter and I would hook up another log while she was splitting the last of the previous one. The only thing I may do is upgrade to a better winch for a faster-pulling speed, which comes with what appears to be an imported 2k winch.

    I am sure it will be fine but they are slow and noisy.

    We split some live oak that I felled last weekend, biggest round was probably 24” across and 21”-23” long. No issues at all lifting them. No more wrestling the big one to split with splitter vertical and def no more picking up a bigger round for me. The owner of the company is very responsive to questions and seems like a genuinely good dude.

    The Positives

    • The Gorillabac Model 3803 comes with the Gorillabac Grip Model 830 screw ring included.

    The Negatives:

    • It does not include the Pickup truck extension Model 4000
    • Does not include a battery for its operation
  • Best 2 Stroke Oil For Chainsaw – a 4 Brand Show down

    Best 2 Stroke Oil For Chainsaw – a 4 Brand Show down

    Best 2-stroke Oil for Chainsaw

    Finding the right type of 2-stroke oil for your chainsaw can be pretty tricky.

    There are just so many different options.

    This article aims to answer the question of what is the best 2 stroke oil for chainsaw overall – and to do this, we’ve listed our four favourite options.

    For each of the four brands I have included a table that givesyou some different sizing options. Simply click through to check the price of each size once you have made your decision.

    One last thing before we dive in…

    Here is our top pick for the best 2 stroke oil for chainsaw:

    TOP PICK: Best 2 Stroke Oil for Chainsaw

    We chose the Amsoil 2-stroke Oil that you can see below for a couple of reasons I will outline underneath:

    The main reason is that it is a fully synthetic oil, and many people (myself included) run it without any lubricity, fouling, or carbon problems.

    Amsoil 2-stroke Oil for Chainsaw

    PROsCONs
    – Contains fuel stabilisation to stop fuel from deteriorating when it has been stored for a length of time. This means you don’t need to add any extra stabilisers when you put your chInsaw in seasonal storage.
    – Superb Lubricity that controls general wear and tear from friction. This means that ring sticking and exhaust port blocking wont be an issue.
    – Delivers very little emissions even when run at 80:1 or even 100:1 mix ratios
    – Great for use in damp environments as it has anti-rust technology incorporated
    – Not the cheapest oil
    – Some may prefer specialized oils for brand-specific chainsaws

    1 quart (32 oz) size treats 12 gallons of gas at 50:1

    Click here for Amsoil Safety Data Sheets


    Lucas 2 Stroke Oil for Chainsaw

    PROsCONs
    – “low smoke” two-cycle oil formulated from a special blend of mineral oil, polybutene and a low ash additive system.
    – Designed to prevent carbon deposits to the piston rings, skirt, crown and under crown areas and prevent exhaust port blocking.
    – It is prediluted with a special solvent to allow you to mix with gasoline’s at all temperatures.
    – Meets the requirement for “low smoke” oils often referred to as “smokeless” oils.
    – prevents carbon deposits
    – At least one customer mentioned that they aren’t all that impressed by the ‘low smoke’ capabilities – though its’ possible this is due to the fuel.

    Another great option.

    Some highlights that make the Lucas 2 stroke oil a good option include the fact that it is designed to allow for effective mixing even when its exceptionally cold. I also like the fact that it qualifies for the low smoke rating – which is great!


    Redline Two Stroke Oil for Chainsaw

    PROsCONs
    – High-temp stability prevents deposits on combustion chambers, exhaust ports, upper ring, and piston crown
    – Dyno proven for gains of 3-5% and more power over longer runs
    – Ultimate in two-cycle performance, extreme cleanliness
    – Contain ester base oils with the highest film strength and affinity for hot metal
    – Increased power and excellent scuff protection
    – Works in both premix or injection systems
    – Low carbon residue dramatically reduces plug fouling and smoke
    – Runs clean and smooth
    – Although great engines that hgave already been broken in, they are probably not the best option for brand new engines.

    Maxima 2 stroke oil for chainsaw

    PROsCONs
    – High performance
    – 100% Synthetic
    – Exceptional protection against wear
    – Very clean
    – Designed to reduce rust and corrosion significantly
    – Designed for High RPM Machines
    – Manufactured in the USA
    – Can sometimes require a few extra pulls to get going.

    This is another great option.

    I really like that this is manufactured in the USA and has been reported to be really good in the low – allowing the throttle to be a little more snappy. Being able to drive lower RPM’s and not have any spluttering is well worth it!

    Summary

    This list is a tough one to choose betwen, as these 4 options are all very good. They all improve on the cleanliness of the engine and offer some kind of rust and corrosion protection. Honestly, you can’t go wrong with any of these options, but as I said to you at the beginning of the article, I really like the Amsoil 2-stroke option.

    What do you think? If you have some thoughts to add, just pop them in the comments below and lets get the discussion going!

  • How to Replace a Pull Cord on a Log Splitter – 5 Easy Steps

    How to Replace a Pull Cord on a Log Splitter – 5 Easy Steps

    The more you use your gas log splitter, the more wear and tear the pull cord will suffer.

    Learning how to replace a pull cord on a log splitter is much the same as replacing a pull cord on a lawn mower, and is a useful skill to have.

    If you choose to leave it, it could become dangerous and not start the log splitter engine at all. If your log splitter pull cord hard to pull then it’s time to at least pull it apart and give it some TLC.

    >> Click here to find a replacement pull cord for your log splitter engine <<

    When you notice the signs of fraying or a broken pull cord, it’s time to replace it.

    The question is, how do you replace the pull cord on a log splitter then?

    How to Replace a Pull Cord on a Log Splitter

    I’ll will share with you the step-by-step procedure to do so below:

    So, how do you replace the pull cord on a log splitter?

    In five simple steps, you will be able to replace the pull cord of the log splitter. Below are the five steps which you need to follow in proper sequence.

    Step 1: Turn off the splitter:

    The first thing you need to do is turn off the log splitter. It might seem like a commonsense tip, but it is necessary to start with this step. After turning it off, you have to let the engine cool down completely. This might take anywhere from 15 to 30 minutes, depending on how long you have been using the log splitter for.

    Step 2: Remove the screws:

    When you look closely at the log splitter, you will notice that there is a surround around the pull cord mechanism.

    You will have to remove this.

    You will have to remove the screws that keep the surrounding in place for doing so. Use the appropriate screwdriver to remove these screws.

    Before you scatter these screws anywhere, it is good to throw them in a Ziploc bag so that you can keep all of them together. You will definitely need these screws again. So don’t lose them!

    Step 3: Cut the cord:

    If the problem is just with a small part of the cord, you can simply cut the cord after pulling it out. However, if the problem is with the entire cord, you will have to pull it out and after that remove it from the socket holding it together.

    If you’re getting only a small part of the cord, there is no need to tie another cord to the imminent cord. In that case, the length of the imminent cord might decrease somewhat, but you will still be able to use the log splitter.

    Step 4: Replace the cord:

    After removing the older cord, now is the time to replace it with the newer one. Usually, when you buy a pull cord for a log splitter, you get them in the same size. That is why checking the size is not important.

    However, if you’re very particular, measure the new pull cord and the older one to ensure that it is of the same size.

    To insert the new one, you have to insert the tip of the pull cord into the assembly of the older one. You might have to tie it at that point to ensure that the new pull cord remains in place.

    How to Replace a Pull Cord on a Log Splitter

    Step 5: Screw the surround back on:

    Many people forget this last step. You have to understand that if you use the log splitter without the surround on the pull cord, you might get injured by the pull cord the next time you pull it hard. That is why you have to screw the surround back in place. To do so, you have to use the same screwdriver and screws which are used in one of the above steps.

    That’s it!

    In these five steps, you can replace the pull quote from the log splitter.

    There are, however, a few tips that you need to follow while doing so.

    Tips on how to replace the pull cord on the log splitter without issues:

    When you follow this handful of tips when replacing the pull cord, you can avoid most of the issues and replace the pull cord quickly and easily.

    1. Make sure the engine is cool:

    Before removing the surround, take the log splitter to replace the cord and make sure that the engine cools down completely.

    If you’re afraid of touching the outer casing since it might be hot, it is good to let the log splitter be for at least forty-five minutes before starting the procedure to replace the cord.

    1. Size the cord in advance:

    If you’re very particular about the cord length and do not want to use a shorter cord, then before buying the replacement cord, measure the size of the existing cord.

    That way, you will get a larger one or at least a cord of the same length.

    1. Wear proper protective gear:

    As a precaution, always wear protective glasses and gloves while replacing the cord. The truth is that replacing the log splitter’s pull cord is a very easy procedure. However, you shouldn’t skip out on the protective gear.

    1. Test it after replacing:

    When wearing all the protective gear and you have screwed the surround back into place, it is good to test the log splitter. You have to test the log splitter away from everyone else to ensure that in case something is not right, you do not hurt anyone. Preferably, you should test the log splitter under the supervision of someone experienced.

    What causes a pull cord to lock up

    It really depends on your machine, but can sometimes be caused by excess oil being trapped in the combustion chamber. This causes a hydraulic lock, and would need you to release the pressure in the chamber by unscrewing the spark plug.

    In summary:

    Replacing the pull cord on the log splitter is certainly not a difficult task. Once you follow the five steps above, you can do so on your own without hiring a professional. Next time around, you notice the fraying of the cord, simply follow our guide above, and you will be able to replace it yourself.

  • Detail K2 Utility Trailer – A Complete Review

    Detail K2 Utility Trailer – A Complete Review

    The Detail K2 utility trailer has become a very popular trailer for all sorts of loading and unloading jobs. To know more about it, check out this article.

    Detail K2 Utility Trailer - Well.. better than this one.

    Introduction

    Utility trailers are very handy for carrying and transporting personal things you can not fit in your car. These trailers are attached to the back of cars and moved around. You can easily transport recreational vehicles, building supplies, lawn care materials, garden supplies, appliances, or furniture from one place to another.

    Despite its many uses, utility trailers are not often used out in the street since they have specific requirements. You need a durable, sturdy, and long-lasting trailer you can use anytime you need. Fortunately, the Detail K2 utility trailer fits all these criteria perfectly.

    Detail K2 Utility Trailer Product Description

    The K2 Utility Trailer is manufactured by DK2, a North American industry leader, and is a very popular option among professionals and do-it-yourselfers. It is a fully welded, heavy-duty utility trailer designed to handle tough terrains and harsh working conditions. 

    First, let’s look at its technical details.

    • Backdrop gate
    • Steel powder-coated black frame
    • Six tie-down spots
    • Minimalistic design
    • Extended bed length of 5 feet
    • Quick-release lock
    • Two-position dump bed
    • Removable side panels
    • Corrugated steel floor
    • Tail-light protectors
    • V-tongue design for enhanced stability 
    • Solid cambered axles
    • 2-inch coupler with safety chains

    Features and Benefits

    Now let’s see the benefits of this utility trailer:

    1. Trailer Size

    The bed of the trailer is 88 inches long and 52 inches wide and is fully made of welded steel. Overall, the trailer’s length is 12 feet. This makes it perfect for heavy-duty hardware store runs and hauling trash, dirt or even an ATV. 

    To get even more space from the trailer, you can simply open and fold down the load-bearing tailgates and side panels. Both the front and rear tailgates are 24 inches long. So, folding them down should give you a total of 136 inches of space to work with. 

    The height of the side panels are 12 inches each. You have to remove them if you have wider loads because they can not be folded down like the tailgates. You will have to take them apart by removing two bolts in the front and rear of each side. The distance from the bed to the coupler is about 45 inches. 

    2. Payload Capacity

    The trailer weighs only about 450 lbs but has an amazing payload capacity of 1600 lbs. However, if you are carrying heavy loads, make sure to place them in the middle, directly right over the axle.

    To make sure your load stays firmly attached you need to use the six tie-down locations surrounding the trailer.

    3. Ease of Assembly

    The trailer can be assembled in an hour with relative ease. You will, however, need a lot of working space to assemble it.

    Here is a quick rundown on how you can assemble it by yourself.

    The trailer frame is shipped upside down and you should keep it that way. First, grab the leaf springs and insert them in the spring channels. Take out the tongue tubes and place them so that the end parts of the tongues can be connected to the leaf springs. 

    You will find 115-millimeter bolts that you will have to run through the tongue tube and into the leaf spring to attach them. Do the same for both sides. Now you can slide the coupler around the front end of the tongue tubes and lock it in place.

    You can then attach the axle on top of the leaf springs. Lift the entire platform and attach the tires on both sides of the axle. Now you can connect the main harness with the cables and install the lights. Get someone to help you flip your trailer so you can attach the fenders, side panels, and tailgates.

    The entire process is very easy for people who are familiar with using tools. To make things easier, the trailer comes with an easy-to-understand manual. Plus, there are tons of videos on YouTube to help you out if you ever get stuck.

    4. Solid Axles

    The trailer features a strong squared cambered axle with easy service hub bearings that helps the tire wear evenly under your loads. 

    As for the wheels, the Detail K2 utility trailer has two nice 530-12 wheels and tires that are very easy to grease. This gives the trailer a ground clearance of 10 inches. Also, there are two fenders that keep road grime, dirt, and debris from splashing onto the trailer.

    5. Additional Information about the Detail K2 Utility Trailer

    Here are some features that do not quite fall under any specific categories but are definitely worth mentioning:

    • The trailer is made of sturdy steel and has a strong black powder coat finish. This makes it resistant to rust and corrosion. The black finish also gives it a glossy look, and the paint lasts for a very long time.
    • The tow position bed tilts for easy unloading or dumping. The rear tailgate can even be lowered down to make dumping easier (but make sure you do not use it as a ramp).
    • The trailer is completely wired for road use. You will have running lights, brake lights, indicators, and even side marker lights. All the lights are VOT compliant LED lights and can simply be plugged into your vehicle’s 4-pole connection. The lighting system in the trailer is also pre-wired for quick conversion.
    • The trailer comes with a two-inch tongue stand that prevents the coupler from getting damaged. The coupler can be securely locked in place by using two safety chains and an included pin.
    • The leaf spring suspension easily absorbs shocks over rough terrains and road bumps.

    Final Thought

    The K2 utility trailer is the perfect heavy-duty trailer for all your loading and unloading needs. The sturdy frame, hefty features, and roadworthiness make it a top choice for professionals and anyone who needs to carry loads. 

    Image link: https://www.pexels.com/photo/lumber-carriage-on-fir-tree-farm-5727709/