Category: Log Splitting Info

  • How to Stack Firewood – 4 Steps to Become a Firewood Master Today!

    How to Stack Firewood – 4 Steps to Become a Firewood Master Today!

    Stacking firewood is an ancient practice that has been perfected for both it’s practicallity, but also it’s aesthetics.

    Why Learn How to Stack Firewood Properly?

    Stacking firewood is not only aesthetically pleasing and orderly, it is also essential to creating a system of easy-to-reach, dry wood that is ready to use when you need it.

    Learning how to stack firewood properly helps to keep the wood from rotting or housing bugs that may make the wood smoky or difficult to light. While there is not a single correct way to build a stack, there are several things to keep in mind when learning how to stack firewood efficiently.

    Things to Remember

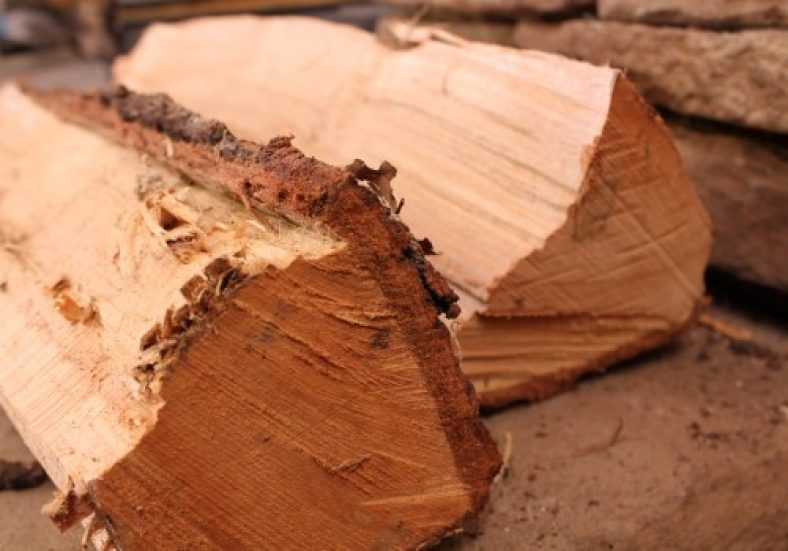
    1. Keep the side with the bark facing down, and the cut side facing up and out.
    2. Make sure that the dry wood is accessible from the outside.
    3. Elevate the stack from the ground.
    4. Cover the stack loosely so as to allow airflow.

    Keeping Cut Sides Exposed

    How to Stack Firewood - The Jenga Method

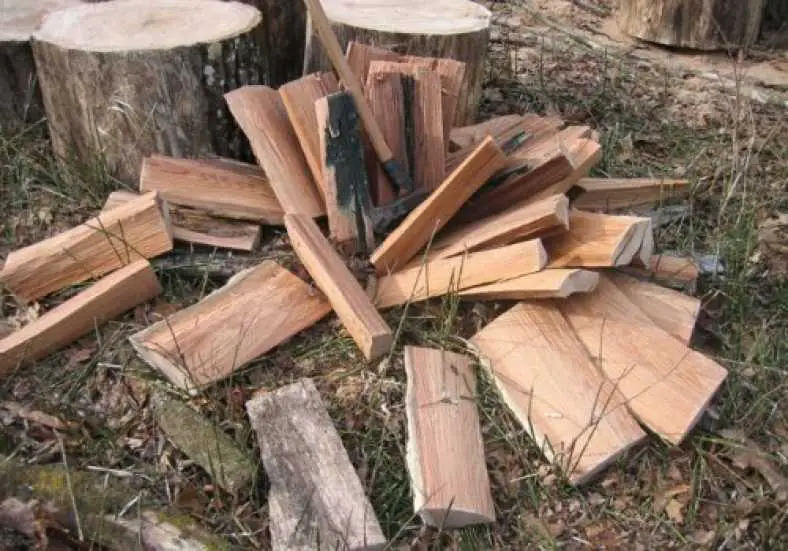
    There are many ways to achieve this goal. One of the simplest and most common methods involves stacking the wood in a tower not unlike a Jenga tower, with layers of logs crossing each other. In this method, the useable wood is pulled from the top. The lower part of the tower remains naturally spaced so that air and sunlight can dry any moisture that finds its way into the stack and preserve the wood.

    There are methods which are more complicated (but unique and beautiful to see in a backyard) such as the traditional method from Germany which builds a circular “house” from logs. Cut wood is placed inside the house where it is protected from the rain or snow, but is exposed to airflow that will slowly dry out the wood.

    Of course, there are commercial log stands that will help stack wood as well. These can be very useful to help properly stack wood without worrying about technique and, in a pinch, are still much better than tossing cut logs into a massive pile. If you’re interested in purchasing one of those, check out our favourite option below, otherwise, skip further down for the guide:

    Make the Wood Accessible

    This may seem like a silly reminder, but it is easy to forget when stacking wood. Especially with commercial log racks that often have tops or sides to them, making sure to stack the wood in a way that makes the wood accessible to remove is an important thing to keep in mind.

    How to Stack Firewood - Cut end facing out

    Do not stack the wood higher than you can reach comfortably- about 4 feet tall is a good rule of thumb if you’re unsure. Make sure the wood is not in places where it will be difficult to grip or pull out, either.

    In addition, the driest wood should be available on the outside. As mentioned previously, the logs on the outside should always have the cut side facing out so that they can dry and be within reach when they are ready for use.

    The exception to this is wood that is already seasoned or properly dried below 20% moisture. Wood that is already seasoned can be placed on the outside of the stack with its bark facing out to use as natural protection against rain and snow.

    Elevate the Stack

    Firewood should never be stacked directly on the ground. Not only will the bottom logs be ruined by moisture and mud, but the wood will become a perfect home for ants and termites. This is another case where commercial firewood racks can be useful.

    They often use metal or treated wood to elevate the stack off the ground. Other options include stacking the firewood on a concrete slab or palette.

    Cover the Stack

    The most common mistake with stacking wood comes when it is time to cover the stack. Many people use a tarp to cover their firewood stacks to protect it from rain and snow. This is fine, but if you are using a tarp, make certain that the tarp does not come all the way to the ground.

    All of the above tips will be no help if the stack is cut off entirely from sun and airflow. Only cover the top half of the stack at most when using a tarp.

    Other methods to cover a firewood stack include a lean-to-style covering with treated wood or an aluminum roof (such as in the image below), or using poles to raise the tarp off of, and above the stack.

    So that is the nuts and bolts of how to stack firewood. It’s important to remember that airflow is probably the most important asset when learning this skills as you want your wood to be nice and dry when you come to use it. Anyone can learn how to stack firewood, you just need to apply some patience, and consistency. Have fun!

  • How to Replace a Wooden Axe Handle – A Convenient Guide

    How to Replace a Wooden Axe Handle – A Convenient Guide

    In today’s world of throw-away tools and throw-away products, fixing a broken axe handle is a skill that not many people have anymore.

    It’s really not a difficult thing to do, but something that was commonplace in years gone by.

    This article will give you everything you need, to learn how to replace a wooden axe handle.

    These days, it’s pretty difficult to find an axe of any quality, or even a hatchet, or mallet.

    Most of what you’re going to find in your hardware store is going to be mostly rubbish, forged in Brazil, Mexico, or China with garbage steel.

    These types of cheap and nasty axe heads:

    • Don’t hold an edge very well
    • Aren’t tempered correctly
    • Essentially just a bunch of recycled material dumped into a cauldron melted down and poured in the form of an axe
    • Some cheap manufacturers go so far as to simply fill the blemishes and the pits with resin, and then just paint over it

    Honestly, at this point – if your axe shows signs of any of the above, I would think about getting yourself a new one or even better – a quality USED axe.

    What you need to Fix a Broken Axe Handle

    To learn how to replace a wooden axe handle you’re going to need a few tools.

    Here is a list of the things you will need:

    • Your broken axe
    • 80 grit sandpaper.
    • Standard premium wood glue.
    • 2 x Metal wedges
    • 1 x wood wedge
    • a few basic hand tools.
      • A Vice
      • Hammer

    In many instances, the handle of an axe can become recessed from the head and work loose (ie. the head of the axe appears to be coming off the top)

    How to fix a broken axe

    This is a very dangerous situation.

    The axe head could break off in mid-swing. More than one logger or woodworker has been seriously injured or killed in this situation.

    So let’s get to it,

    Steps for How to Replace a Wooden Axe Handle

    OK, I apologise the having 21 steps for how to fix a broken axe handle, but I wanted to give you more detail than you probably needed so you don’t miss anything. Good luck!

    1. Cut off the old handle underneath the base of the axe head
    2. With a large punch, drive the remaining handle out. Note that the hole in the bottom of the axe head, it’s larger than the hole on the top.
    3. So that you don’t forget which way up the axe head goes, take a centre punch on the top, and mark it
    4. Remove the metal wedges from the top of the old handle You’ll be needing these now that your axe head is removed
    5. Purchase yourself a new Axe Handle – See ‘What to look for in a new axe handle’ below
    6. Once you have the new handle, push the head down about an inch. You won’t get it fully on here though because the timber handle will widen. We need to custom fit it to the head.
    7. Place the new handle in your vice, it’s time to fit the head. Inserting it from the bottom slide it on and work it back and forth. Once you have pushed it on as far as you can, remove it.
    8. Take a good look at the timber handle. What you will see are the shiny points of contact on the timber where the axe head could not be pushed further. We are going to remove that material so that you can put the head on and slip it all the way up to where the handle is tapered.
    9. Use sandpaper of a pneumatic roll lock to slowly remove the excess wood to allow the head to slip on.
    10. Once you have enough of the excess wood removed, place the head on the handle and grip the head, whilst knocking the base of the handle on the floor – this will seat the head in tightly and leave some of the handle poking through the top of the head.
    11. An axe handle should come with an accompanying wooden wedge and a curf cut which splits the top of the handle in two, giving you a place to knock in the wedge. Place the wedge in the curf cut, making sure it’s not too wide apply some wood glue to the wedge on the bottom half and seat it in with as much hand pressure as possible.
    12. Use the old handle to place over the top of the wedge and knock it in further with a hammer.
    13. Use a Sawzall or hand saw to cut off the excess handle that is sticking out the top of the axe leaving about 3/16-1/8 of an inch above the axe head.
    14. Sandpaper down the top of the handle.
    15. Now we are installing the metal wedge. If you are working with a small axe, one metal wedge is enough, but two is appropriate on a larger axe
    16. Center the metal wedge right on the wood wedge and hammer it on in.
    17. Once the metal wedge is is flush, take a punch and knock it in just a little bit under the height of the wood.
    18. If you are working on a larger axe, evenly space the next metal wedge and repeat step 16 and 17 again.
    19. Use some 180 grit sandpaper and work the full length of the handle to remove any depressions, dirt or grease marks.
    20. Treat the wood of your new handle with the boiled linseed oil by using rubber gloves and wiping it over the handle. If you use a rag, you will find that most of the boiled linseed oil is wasted on the rag.
    21. Wait 15 mins and re-apply the boiled linseed oil 2 more times. Don’t forget the top of the handle.

    What to Look For in a New Axe Handle

    At some point, you will need to go and purchase a new handle for your axe. I would suggest that you visit a reputable hardware store to buy your new handle.

    • Make sure you purchase a new handle that is either made from Hickory or Ash.
    • DO NOT buy anything that has varnish on it. (Any manufacturer that would varnish on a handle clearly doesn’t know much about handles as you will certainly get blisters with any serious use.)
    • Make sure that the new handle is a bright white color.
    • If It has a lot of granulation, knots, or colors, avoid it.

    Where to find a decent axe to repair

    If your axe seems to be like one of the cheap and nasty ones described earlier, it’s possible that you may decide to just get yourself a new axe to work with.

    One thing I like to do is hit garage sales and find old axes.

    It’s possible to find some great quality second-hand axes around the place.

    One thing to look out for are axes that have USA markings on them. Anything you find with, USA, German, or Swedish markings, is typically going to be good quality steel.

    Now that you know how to easily replace the handle, don’t stress if the handle is in poor condition.

    Even if the head is all rusty, The key thing to look for here is whether or not it has a ‘clean edge’.

    In other words, are there chips, that are too large to be filed out?

    If it has a good solid edge, even if it’s not overly sharp, that’s okay – I can tell you how to fix that.

    As long as the head is in good shape, with a decent edge, no cracks, or anything obviously wrong with it -you have the makings of a fine tool that will not be replaced easily.

  • How to Split Logs

    How to Split Logs

    The word log splitter brings to mind manual and electric log splitters that are readily available on the market. While it’s true that they are the best equipment to quickly and efficiently split logs, there are other procedures you can employ for wood splitting. This article with explain explain how to split logs the most efficient way possible, and meet your budget needs.

    Learning how to split logs by hand is a great way to save money because the necessary tools are cheaper than machine splitters. It’s also a healthier wood splitting option because you work up a good sweat burning calories, and can even get some killer abs.

    How to Split logs By Hand

    The best tools to use to split wood by hand are with a splitting maul, axe, wedge and hammer.

    1. Splitting Maul

    Splitting mauls are heavier than axes, and have a wider head, making it so much easier to split wood. An axe can get dangerous because it can cause accidents. They are better for cutting wood, against the wood fibres.

    Mauls usually come with an eight-pound head, but there are also lighter ones which are better for smaller pieces of wood. Mauls also have longer handles than axes, usually measuring 36”. Longer handles ensure the maul is long enough to hit the ground after the strike instead of your foot.

    The idea behind using mauls to split wood is to create a momentum so that the blade makes way through the wood. It is the momentum of the swing that makes the split because mauls don’t have sharp blades. The other side of the head is flat and is used for driving in a wedge.

    1. Splitting axe

    Different types of axes are used for cutting, felling, splitting and shaping wood where splitting axes are designed to split wood fibres. This is unlike cutting and felling axes which cut through wood fibres to cut or fell tree trunks. This is why you should not use felling or cutting axes to split wood. You’ll only end up frustrated and lose your patience!

    They are ideal to split small and dry pieces of wood. It weighs between 3 to 6 pounds and has a tapered head. While it’s sharper than the maul, it’s lighter, making it difficult to generate the required momentum to split larger and heavier wood. In other words, axes are best used only for lighter wood jobs.

    1. Wedge and hammer

    A wedge and hammer together can help split wood. They are best used for difficult to split wood like knotty or thick pieces of wood, and where the maul is too cumbersome or heavy to haul around.

    The wedge’s triangular shape helps start a seam along the wood by placing it along the wood grain and giving it a tap. Once it’s firmly in place, give a firm blow with the hammer and the wood nicely splits into two. However, you need some knack and coordination to do this and two people because it’s difficult getting the wedge placed perfectly.

    1. Gas powered log splitter

    Splitting wood by hand is indeed a healthy and cost-effective proposition. However, it can get tiring, and take up lots of time if there’s lots of wood. This is why an electrical or gas powered log splitter is better if there’s lots of work to do.

    It will help you split all the wood within a day, which you would need a few days to achieve by hand. They are however expensive, and worth the investment only if you have lots of work to do. It’s otherwise better renting one for a day or two to get all your work done. For more information about Gas powered Log splitters, click here.

    Some Useful Tips on How to Split Logs

    There’s no steadfast rule because wood splitting requires practice, and each person develops a technique that works best for them. While you have to find the best technique for yourself these tips should help you with your quest.

    • Large pieces of wood

    It is better to use a maul to split wood larger than 7 to 8 inches. A wedge is better in case of wood larger than 9 or 10 inches. Placing the wedge where there’s a hairline crack increases the crack size and successfully splits wood on the first try.

    • Small pieces of wood

    While it’s satisfying splitting a small piece of wood with an axe, it needs practice because there is the risk of the axe getting stuck. The axe edge is sharper than the maul. While it easily drives deep into the wood to split it, it’s not good news if the wood doesn’t split.

    You end up wasting lots of energy either pulling the axe out of the wood or pounding it and driving the axe all the way through. An axe is useful only if you manage to split the wood at the first attempt.

    • Knotted wood

    It’s a bit difficult splitting knotted wood with its fibres going in all directions. It’s better to start with a wedge, preferably at the end without the knot first. This helps to get the spilt going after which you can use your momentum to work through the knotty parts.

    • A chopping block helps

    Manually split wood is easier if the wood is raised by placing it on a chopping block. This way you needn’t bend much and it puts minimal strain to your back. However don’t use too high a block, especially if you are using a maul because you height will prevent you from getting enough momentum.

    • Don’t split wood on cement

    It’s better to split wood on soft ground or a wood block under the log, and not on cement. This is because a maul or axe will hit the cement after splitting the wood, to quickly wear out the blade. There’s also the risk of the blade bouncing off the cement and hitting you.

    • Stubborn wood

    There are always some wood pieces that just won’t split. Wood pieces differ because of the different tree species. So while some pieces split effortlessly, others are so hard, it’s better using an electric or gas-powered log splitter.

    While an electric log splitter is a quiet and easy option, it’s rather slow and works with minimal capacity. It’s better renting gas-powered log splitters to effortlessly split any sized log at home.


  • What size log splitter do I need? – A Comprehensive Guide

    What size log splitter do I need? – A Comprehensive Guide

    So you’ve found yourself wondering ‘what size log splitter do I need?.’ I guess that means you intimately know that splitting logs is an arduous, back-breaking, time-consuming, pain-in-the-backside type task.

    If you need firewood for heating in particular, you really have no choice but to split wood on a regular basis.

    As I can already tell, because you’ve found your way here, you know that if you are splitting logs manually, it takes a lot of time and effort.

    A wood (or log) splitter can seriously save both your back, and your time by splitting logs much faster than otherwise would be possible.

    However, as you can imagine, there are so many types and sizes to choose from. You’re not alone in wanting to know

    What size log splitter do I need?

    – you, (today).

    Well, you may find the answer in the following buying guide based on the questions you will most probably ask before buying a log splitting machine:

    What type of woodpile do you have?

    What-Size-Log_Splitter-Do-I-Need?

    You need to choose your splitting machine based on the hardness of the timber you will be cutting. All woods come in different levels of hardness, and its hardness or softness determines by the amount of tonnage or force needed to split it.

    Softer woods like poplar, birch and pine are best used in autumn as they burn faster, and are easily split with less tonnage and pressure. Hardwoods like maple, oak and hickory may burn longer to give more heat in winter seasons, but need more tonnage and pressure to split.

    On a scale of 1-5, the softer poplar and pine stand at 1 and 2 respectively while the harder oak and hickory are 4 and 5.

    What is the size of the logs?

    Choose your log cutting machine based on the width of the widest logs in your woodpile as the more powerful machines can split logs with bigger diameters. If you have to split more oak tree logs with a 24-36” diameter, a 35-ton unit may be what you need. However if you are a homeowner where the largest log you may split is a 6” diameter softwood, then a 4 ton unit is just right for you.

    Are your logs green or seasoned?

    This is very important in determining the amount of force needed to split the wood. Freshly fallen logs are greener and wetter, and thus need a higher tonnage to split than seasoned wood that’s dried out over time. Sometimes too green wood may need as much as an extra 10 ton force.

    What about log splitter tonnage?

    What-Size-Log-Splitter-For-Hard-Oak-Wood

    Log splitter tonnage is the amount of force the machine exerts on the log to split it. Obviously higher tonnage means more force is exerted onto the log to easily cut through hardwood and bigger logs. Log splitting machines with lower tonnage are generally smaller machines that consume less energy and exert less force.

    Log cutting units come in a range of tonnages ranging from 4 to 60 tons. You have to choose based on the type, and diameter of wood you will cut. It’s essential you know how much power you need as it’s a waste of money investing in a splitter that’s bigger than your requirements.

    So what size log splitter do I need?

    Don’t assume that a big unit is a better selection as big is not always better. In fact, big devices are rather cumbersome and unwieldy to use. Generally, big units are a better choice only if you have to split big logs while smaller electric ones are better for cutting small timbers.

    The chosen unit should not only have enough tonnage to split your woodpile but should also be able to quickly split wood. Many units with a high tonnage usually come with a low cycle time when compared to other smaller units. And cycle time is the amount of time needed for the piston to push out and retract while splitting logs.

    How much wood do you have to split?

    If you want to buy your machine based on the amount of wood you have to split, check the machine’s automatic ram return time. This feature ensures your wood is quickly cut, a necessary feature if you have lots of wood to cut. Remember, the less time that is spent on cutting woods, the more time you get to spend enjoying your fire!

    What is log splitter cycle time?

    This is the amount of time the splitting machine needs to split logs. If speed’s your priority, fast log splitters are a better choice, instead of machines with a long cycle time. On the contrary, you only end up tired trying to keep up with machines with too fast cycle times. Generally a machine with a 15-16 second cycle time is a reasonable choice.

    What is the machines motor power and quality?

    What-Size-Log-Splitter-To-Split-Wood

    Find out the splitting machine’s motor capacity to ensure it has sufficient horse power to cut your wood. Also find out its hydraulic capacity and level of construction and engineering as they all determine how well the machine can handle your wood splitting tasks.

    Are replacement parts easily available?

    This is important as it’s better to buy a splitting machine with manufacturers you can rely on to quickly provide you with replacement parts. This is to avoid wasting time waiting for new parts to reach you in the middle of your wood cutting project.

    What is the machine’s average log length?

    Choose your splitter based on the average length of the logs you will be splitting. The machine is useless if it can’t split the long wood logs of your woodpile. Of course, you can always chop the logs short, but this is a waste of your time and efforts. And as it’s easier splitting longer logs vertically, it’s better buying the larger gas log splitters to split your wood both in a horizontal and vertical positions.

    Are all the logs in one place or do you need a portable machine?

    If you have logs to split in different places, you may need a splitter with wheels or at least a ball hitch for its easy transportation.

    Do upgrades and design enhancements cost extra?

    If you want features like log trays, metal fenders and dual-loading capacity in your machine, find out if they are included in its cost, or come at an extra cost.

    How long is the splitters warranty?

    You can tell how confident the manufacturer is with their product based on the warranty they offer where 2-year residential warranties are standard.

    Do you have electrical power available?

    Choose your device based on your power source as you can use a clean electric splitter if there’s an electrical outlet nearby to plug it into. If there’s no power source near the woodpile, then it’s better to choose a cordless gas-powered one.

    Homelite 5-ton Electric Log Splitter Review – 25 in Oak Log

    The answers to all these questions should give you a good idea about what size log splitter do I need. You just have to collect all your data, and compare it with the features of different log splitting machines to make your final decision.