Blog

  • What Is The Best Length to Cut Firewood?

    What Is The Best Length to Cut Firewood?

    We all are aware that evenly cut logs will burn well.

    They are easy to dry consistently, easy to catch fire, and efficient to use.

    The thing is that most people do not know what the ideal length is that they should be cut to.

    So, What is the best length to cut firewood into?

    Ideally, the best length of cut firewood is 16 inches.

    What Is The Best Length to Cut Firewood
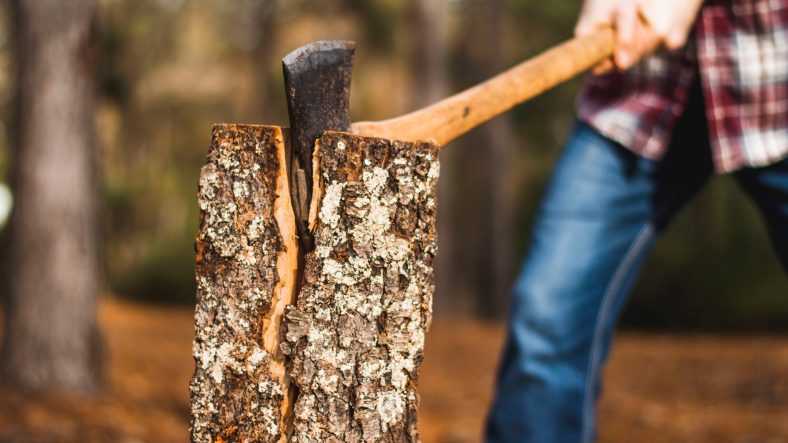
    Male worker with an axe chopping a tree in the forest.

    The weight should be around 6 inches. When you cut into this size, it is easy to put into the firewood. Anything other than that, and the logs will burn too quickly. If they are thicker than these dimensions, they will take too long to dry.

    That is why; this is the best length to cut firewood into.

    To help you out, we will share a few techniques you can use to cut firewood into these dimensions.

    How to cut firewood of the same length?

    There are essentially four different ways to cut firewood into the same length. You can use the technique which suits you the best as a firewood length marker.

    1. Use the chainsaw as a measuring tool:

    The first one is to use the chainsaw as a measuring tool itself. You can mark 16 inches on the chainsaw. After that, whenever you plan on cutting a log of wood, you can use the chainsaw as a measuring tool and ensure that you inflict the cut at the right position. That way, you will not require any additional tools.

    Even when dealing with wood in bulk, this technique will save you a lot of time. It will not hinder the natural process of cutting wood into logs.

    1. Use a spray marker:

    The second option which you have is to carry a spray marker. You have to roll the wheel on the log lengthwise. When you do so, it will dispense the same amount of paint at every point of contact. Once you see the paint, you can take your chainsaw and cut it at that length.

    Since the circumference of the wheel is constant, it will apply the paint at the same point, and therefore you will always cut the firewood in equal length.

    If you want to cut it into 16 inches, you have to choose the wheel accordingly.

    You could also try one of these clever little tools called the Mingo Firewood Marker:

    1. Use a bar attachment:

    There are numerous measuring bars available as well. That way, they will allow you to measure the wood up to 16 inches. After that, you can use a regular marker to mark the position and cut it using the chainsaw.

    These bars are not bulky and highly portable. That is why carrying them with you is easy.

    1. Use tape to measure:

    Last but not least, you can take a measuring tape with you. The measuring tape allows you to measure any length and mark the wood. That way, it becomes easier to cut the wood where you want.

    These are the four ways to cut firewood to the right length.

    Why should you be consistent with firewood length?

    We briefly touched upon why you should cut firewood in the same dimensions. We will go into the details of these reasons below.

    1. easy to store and handle:

    Uneven logs take up a lot of space. Nobody has this extra space when you want to store the logs for the entire season.

    It is a much better idea to cut them into the same size to avoid this problem. That way, stacking them up and storing them in a small space is easy.

    1. Efficient burning:

    Same-sized logs require the same amount of heat to burn. That is why, when you put them into the fire, all will catch fire simultaneously. That way, you can predict the amount of heat they will provide and use the firewood accordingly. It will reduce the amount of wood you need to generate the required amount of heat.

    1. Easy to dry:

    Drying time also depends on the thickness of the wood. Since the dimensions are the same, all such logs of wood will dry simultaneously, making it easy for you to use them.

    In Summary

    Thus, the best length to cut firewood is 16 inches. Once you go through the guide above, you will know how to cut every piece of wood into the same length and why it is essential.

  • 25 or 30? What is the Best Angle to Sharpen a Chainsaw?

    25 or 30? What is the Best Angle to Sharpen a Chainsaw?

    Chainsaws are generally considered to be pretty robust.

    However, with consistent use, every chainsaw will become blunted somewhat. This can lead to your chainsaw using a significant amount of extra fuel, along with unnecessary wear and tear to your chainsaw.

    If you’ve never been shown, knowing how to sharpen a chainsaw isn’t all that obvious.

    The trick to a good sharp chain is to make sure you sharpen it at the right angle.

    But what is the best angle to sharpen a chainsaw?

    What is the best angle to sharpen a chainsaw? - Sharpening your chainsaw chain shouldn't be a hassle!
    Demonstrating chainsaw sharpening with a small file

    This article will explain the things you need to consider to sharpen your chainsaw most effectively, depending on the model you own.

    So, What is the best angle to sharpen a chainsaw?

    While the exact angle might vary depending on the chainsaw you use, it is generally between 25 to 30 degrees for the top plate filing angle.

    Each type of chain can be slightly different in its recommended sharpening angle. So for this reason, I have included a chart for some of the major chainsaw manufacturers below. However, you should find details of what is the best angle to sharpen a chainsaw in the manual that came with your chainsaw, or as a set of instructions included when you purchased the chain.

    There are 4 key angles you need to think about when sharpening your chain, they are:

    • Top plate filing angle
    • Side plate cutting angle
    • File down angle
    • Depth gauge setting

    If this seems a little overwhelming, I would highly recommend grabbing one of these kits to achieve the right angle just by following the etched guidelines in the tool:

    If you’d like to see a Stihl chainsaw sharpening angle chart just click this link.

    Husqvarna chainsaw chain sharpening angles

    CHAINFILE DIAMETERDEPTH GAUGE SETTINGFILE DOWN ANGLETOP PLATE FILING ANGLESIDE PLATE CUTTING ANGLE
    X-CUT C83/C85/S83G7/32″ 5,5 mm0,025″ 0,65 mm30°60°
    X-CUT SP33G3/16″ 4,8 mm0,025″ 0,65 mm30°60°
    X-CUT S93G5/32″ 4,0 mm0,025″ 0,65 mm30°60°
    X-CUT SP21G5/32″ 4,0 mm0,025″ 0,65 mm30°60°
    H005/32″ 4,0 mm0,025″ 0,65 mm10°30°85°
    H21, H23, H263/16″ 4,8 mm0,025″ 0,65 mm10°25°60°
    H22, H25, H283/16″ 4,8 mm0,025″ 0,65 mm10°30°80°
    H303/16″ 4,8 mm0,025″ 0,65 mm10°30°80°
    H35, H375/32″ 4,0 mm0,025″ 0,65 mm30°80°
    H384,5 mm0,025″ 0,65 mm30°75°
    H46, H42, H45, H47, H48, H50, H47S, H48S7/32″ 5,5 mm0,025″ 0,65 mm10°25°55°
    H49, H51, H54, H587/32″ 5,5 mm0,025″ 0,65 mm35°85°
    H56, H57, H56S, H57S7/32″ 5,5 mm0,025″ 0,65 mm10°25°60°
    H64, H64S7/32″ 5,5 mm0,030″ 0,75 mm10°35°85°
    H80, H817/32″ 5,5 mm0,025″ 0,65 mm10°25°60°
    H82, H83FLAT0,025″ 0,65 mm15°90°
    (https://www.husqvarna.com/au/learn-and-discover/file-and-filing-device-recommendations/, 2022)
    What is the Best Angle to Sharpen a Chainsaw?
    What is the best angle to sharpen a chainsaw? This old farmer knows!

    Oregon Chainsaw Sharpening Angle Chart

    FILE DIAMETERDEPTH GAUGE SETTINGFILE DOWN ANGLETOP PLATE FILING ANGLESIDE PLATE CUTTING ANGLE
    1/4″25AP5/32″.025″10º30º85º
    .325″ Low Profile80TXL5/32″.025″10º25º70º
    3/8″ Low Profile90PX, 90SG4.5mm.025″30º75º
    91P, 91PX, 91PXL5/32″.025″30º80º
    91VXL, M91VXL5/32″.025″30º80º
    .325″95VPX3/16″.025″10º30º70º
    20, 21, 22BPX, M20, M21, M22BPX3/16″.025″10º30º70º
    95TXL3/16″.025″10º30º70º
    20, 21, 22LPX, LGX, M20, M21, M22LPX3/16″.025″10º25º60º
    3/8″72, 73, 75V7/32″.025″10º25º60º
    72, 75CJ, CK, CL*.025″45º45º90º
    72APX, 72, 73, 75DPX, M72, M73, M75DPX7/32″.025″10º30º80º
    72, 73, 75EXL, EXJ, LGX, JGX, LPX, JPX7/32″.025″10º25º60º
    M72, M73, M75LPX7/32″.025″10º25º60º
    72, 72, 75RD7/32″.025″10º10º75º
    .404″27X, 27AX7/32″.030″10º30º65º
    27R, RX, RA7/32″.030″10º10º75º
    58CJ, CL, 59CJ, C, CL.025″45º45º85º
    58, 59J, L7/32″.025″10º25º60º
    68LX, JX7/32″.030″10º25º60º
    68CJ, CL*.030″45º45º

    Now that you are aware of the angle you need to stick to, it is time to understand when you should sharpen the chainsaw?

    When should you sharpen a chainsaw?

    There are numerous indications that your chainsaw has become blunt. We will highlight these indications below to know when you need to sharpen the chainsaw.

    Excessive dust residue:

    You have to observe the pieces of wood which you are cutting. In case there is excessive dust residue coming along with the wood you are cutting, it is a clear-cut indication that the chainsaw teeth are losing their sharpness. The more you procrastinate on sharpening the teeth, the more dust will accompany your cutting wood.

    Higher engine pressure:

    After noticing the dust, you do not sharpen the chainsaw teeth; the pressure on the engine will increase. If your chainsaw has an indicator for the same, you will notice that easily. If it has different levels of force, you will need to switch to a higher level to cut the tree barks, which you use to cut earlier at the lower level.

    If you cannot verify the same through both these features, you have to just hear the engine’s sound. The engine’s sound will be changed when it is under excessive pressure. That will let you know that the chainsaw teeth are losing their sharpness.

    Bounces:

    When the chainsaw teeth can’t cut through wood, the chainsaw is likely to bounce back.

    This is, however, a pretty dangerous situation. If you can’t control the chainsaw in that phase, you might get injured as well. To avoid this, you have to sharpen the teeth of the chainsaw right away when you notice any of the above two problems.

    Irregular cuts:

    The chainsaw, which doesn’t have sharp teeth, will not be able to provide you with a precise cut. When you observe the pieces of wood which you are cutting, you will know right away when they are cut.

    Any of these signs indicate that the chainsaw might be losing sharpness.

    Now it is time to look at the benefits of a sharpened chainsaw so that you will know right away why you need to sharpen at the moment you witness any of these signs.

    When should you replace the chainsaw chain?

    You will know that it is time to replace your chainsaw chain when the longest portion of the cutting tooth is less than 4 millimeters or if you find cracks or chips in the teeth.

    Accessories to Help Sharpen Your Chainsaw Chain:

    Benefits of a sharpened chainsaw:

    The benefits of a sharpened chainsaw include:

    1. Proper balance:

    When the chainsaw has sharp teeth, it will not bounce back. In that case, the balance will be much better as well. You will be able to inflict precise cuts as well.

    1. Low cutting time:

    The amount of time you will require to cut through the branches or barks will be pretty low. This will ensure that you can cut more food at the same time.

    1. Irregular cuts:

    One of the main problems with the blunt chainsaw is that you won’t get regular cars. On the flip side, when the chainsaw is sharpened, you won’t have to worry about irregular cuts.

    1. Reduced engine noise:

    While chainsaws make a significant amount of noise, it increases, even more, when the chainsaw is blunt. Once you sharpen it, the engine noise will decrease. That is why it will become easier to use the chainsaw for a long time with the help of earmuffs.

    These benefits make sharpening the chainsaw a necessity rather than a luxury.

    In Summary

    So, the best angle to sharpen a chainsaw is usually between 25 to 30 degrees. Now that you are aware of the same, you have to look out for the signs of a blunt chainsaw and opt for resharpening it whenever you notice any of those signs.

  • What is the Best Way to Season Firewood?

    What is the Best Way to Season Firewood?

    Firewood is an important and necessary commodity during the colder seasons.

    But what is the best way to season firewood?

    Seasoning firewood reduces its moisture content, preserving the wood’s nutrients and providing sufficient heat. It also improves the wood’s insulation value and makes it easier to start a fire. Proper drying of firewood will also reduce splitting, prevent mold growth, and reduce the amount of smoke.

    There are three methods for seasoning firewood, depending upon the amount of time and space available:

    Method 1 – Air Drying

    The simplest, least expensive, and most common method for drying firewood is air drying. Air-dried firewood is cut into small pieces and stacked so that air can circulate freely through it to eliminate moisture from the wood.

    It should be seasoned outdoors in an open area, away from any tree roots or other objects that may impede airflow.

    What is the best way to season firewood - Air Drying is the most tried and true method

    Air drying can take anywhere from a few months up to a year, depending upon the type of wood and the size of the logs.

    The larger diameter pieces of firewood such as those from cedar, redwood, or cypress trees will dry more quickly than the smaller wood type such as oak or ash.

    Method 2 – How to season firewood FAST – Propane Drying in a Kiln

    Propane drying is best for people who want a quick way to dry their wood but do not want to burn any fossil fuel. To begin, you must purchase a propane oven.

    As with air drying, propane drying should be done outside away from tree roots or other objects that may impede airflow.

    Propane dehydrators are available at most hardware stores or department stores. Many commercial firewood providers use this method on a large scale to process large volumes of firewood on scale.

    Another option is to purchase a propane firebox. This can be found at many home improvement stores and online.

    Method 3 – Electric Drying

    Using an electric dryer eliminates the need to cut firewood into pieces and it consumes less energy than propane drying because it uses less electricity. Electric driers come in a variety of models, with prices ranging from hundreds of dollars to thousands of dollars.

    Electric dehydrators are not as common as propane driers, but they are still available at most hardware stores or department stores. They can also be found online.

    The firewood should be cut into pieces and stacked, just as with the other methods of drying.

    Drying firewood properly can take time, but it is well worth the wait because of the money and energy saved in the long run. Once you have seasoned your firewood properly, it will last for several years without having to be dried again (provided you keep it dry).

    Properly dried firewood will not only burn more efficiently and conserve more energy, it will also reduce the amount of smoke and carbon monoxide that you produce.

    So actually, what is the best way to season firewood?

    Alright, alright, you’ve heard three methods explaining the best ways to season firewood, but which is the best?

    well… as with most things, it depends…

    It specifically depends on your budget and time. If you have lots of time, then you can afford to air dry, however, if you are short on time, we would recommend a propane dehydrator or an electric dryer method.

    Benefits of Seasoning Firewood:

    Firewood should be seasoned outside in an open area away from tree roots or other objects that may impede airflow. Firewood seasoning takes time, but it is well worth the wait because of the money and energy saved in the long run.

    Another benefit of firewood drying is that it reduces the amount of smoke and carbon monoxide you produce when you burn. Properly dried firewood will not only burn more efficiently, it will also reduce the amount of smoke and carbon monoxide that you produce.

    A firewood rack is a neat way to keep unused firewood handy without damaging your property or yourself. They are generally less expensive than a traditional wood shed and require little maintenance after they are put in place.

    To build a wood rack, the wood must be cut into long, thin pieces while still damp.

    When you stack the wood, it should fit loosely to allow air to circulate through the wood. Use pieces any greater than 2 inches in diameter or you will trap moisture inside the rack and make your firewood too wet to burn efficiently.

    A firewood rack should be placed where it is protected from being knocked over or blown over by wind and water. Mark the location of your rack carefully on your property before installing it.

    How long to season firewood after splitting:

    It really depends on the type of wood and how protected the area is that you are drying the wood in. A good tip to speed up the process is to paint the box you are storing the split wood in Black or a dark color so that it heats up the timbe inside. This will work to evaporate any moisture and leave your wood dry.

    How do you season firewood quickly?

    The quickest way to season firewood is to split your wood, then stack it so that there is air flow amongst the wood, and plenty of sunlight. Make sure you put a dark colored cover over it, and let the sun heat it up and do the work for you. Ensure that any cover does not quite touch the ground.

    Is it better to season firewood covered or uncovered?

    Covered! This will aplify the effects of the sunlight, and when paired with good airflow in your stack, you will find that it will dry out very quickly indeed!

    So, what is the best way to season firewood?

    From the article, we can conclude that the best way to season firewood is to let it dry out and build a firewood rack. The cost-benefit of firewood and its energy-saving benefits make this a necessary commodity during the colder seasons.

  • How to Replace a Pull Cord on a Log Splitter – 5 Easy Steps

    How to Replace a Pull Cord on a Log Splitter – 5 Easy Steps

    The more you use your gas log splitter, the more wear and tear the pull cord will suffer.

    Learning how to replace a pull cord on a log splitter is much the same as replacing a pull cord on a lawn mower, and is a useful skill to have.

    If you choose to leave it, it could become dangerous and not start the log splitter engine at all. If your log splitter pull cord hard to pull then it’s time to at least pull it apart and give it some TLC.

    >> Click here to find a replacement pull cord for your log splitter engine <<

    When you notice the signs of fraying or a broken pull cord, it’s time to replace it.

    The question is, how do you replace the pull cord on a log splitter then?

    How to Replace a Pull Cord on a Log Splitter

    I’ll will share with you the step-by-step procedure to do so below:

    So, how do you replace the pull cord on a log splitter?

    In five simple steps, you will be able to replace the pull cord of the log splitter. Below are the five steps which you need to follow in proper sequence.

    Step 1: Turn off the splitter:

    The first thing you need to do is turn off the log splitter. It might seem like a commonsense tip, but it is necessary to start with this step. After turning it off, you have to let the engine cool down completely. This might take anywhere from 15 to 30 minutes, depending on how long you have been using the log splitter for.

    Step 2: Remove the screws:

    When you look closely at the log splitter, you will notice that there is a surround around the pull cord mechanism.

    You will have to remove this.

    You will have to remove the screws that keep the surrounding in place for doing so. Use the appropriate screwdriver to remove these screws.

    Before you scatter these screws anywhere, it is good to throw them in a Ziploc bag so that you can keep all of them together. You will definitely need these screws again. So don’t lose them!

    Step 3: Cut the cord:

    If the problem is just with a small part of the cord, you can simply cut the cord after pulling it out. However, if the problem is with the entire cord, you will have to pull it out and after that remove it from the socket holding it together.

    If you’re getting only a small part of the cord, there is no need to tie another cord to the imminent cord. In that case, the length of the imminent cord might decrease somewhat, but you will still be able to use the log splitter.

    Step 4: Replace the cord:

    After removing the older cord, now is the time to replace it with the newer one. Usually, when you buy a pull cord for a log splitter, you get them in the same size. That is why checking the size is not important.

    However, if you’re very particular, measure the new pull cord and the older one to ensure that it is of the same size.

    To insert the new one, you have to insert the tip of the pull cord into the assembly of the older one. You might have to tie it at that point to ensure that the new pull cord remains in place.

    How to Replace a Pull Cord on a Log Splitter

    Step 5: Screw the surround back on:

    Many people forget this last step. You have to understand that if you use the log splitter without the surround on the pull cord, you might get injured by the pull cord the next time you pull it hard. That is why you have to screw the surround back in place. To do so, you have to use the same screwdriver and screws which are used in one of the above steps.

    That’s it!

    In these five steps, you can replace the pull quote from the log splitter.

    There are, however, a few tips that you need to follow while doing so.

    Tips on how to replace the pull cord on the log splitter without issues:

    When you follow this handful of tips when replacing the pull cord, you can avoid most of the issues and replace the pull cord quickly and easily.

    1. Make sure the engine is cool:

    Before removing the surround, take the log splitter to replace the cord and make sure that the engine cools down completely.

    If you’re afraid of touching the outer casing since it might be hot, it is good to let the log splitter be for at least forty-five minutes before starting the procedure to replace the cord.

    1. Size the cord in advance:

    If you’re very particular about the cord length and do not want to use a shorter cord, then before buying the replacement cord, measure the size of the existing cord.

    That way, you will get a larger one or at least a cord of the same length.

    1. Wear proper protective gear:

    As a precaution, always wear protective glasses and gloves while replacing the cord. The truth is that replacing the log splitter’s pull cord is a very easy procedure. However, you shouldn’t skip out on the protective gear.

    1. Test it after replacing:

    When wearing all the protective gear and you have screwed the surround back into place, it is good to test the log splitter. You have to test the log splitter away from everyone else to ensure that in case something is not right, you do not hurt anyone. Preferably, you should test the log splitter under the supervision of someone experienced.

    What causes a pull cord to lock up

    It really depends on your machine, but can sometimes be caused by excess oil being trapped in the combustion chamber. This causes a hydraulic lock, and would need you to release the pressure in the chamber by unscrewing the spark plug.

    In summary:

    Replacing the pull cord on the log splitter is certainly not a difficult task. Once you follow the five steps above, you can do so on your own without hiring a professional. Next time around, you notice the fraying of the cord, simply follow our guide above, and you will be able to replace it yourself.

  • What’s The Best Firewood For A Fireplace – Top 9 Varieties

    What’s The Best Firewood For A Fireplace – Top 9 Varieties

    If you’ve ever gone out on the hunt for the best firewood for indoor fireplace, you’ll know that it can be a time-consuming process. There are many choices of wood, but not all of them are appropriate for the fire. The following are the most popular woods for fireplaces, as well as their best uses.

    What's The Best Firewood For A Fireplace

    so… what’s the best firewood for a fireplace?

    It’s all in the list below:

    Southern Pine

    Southern Pine is common firewood, with a soft, uniform texture. It has an ideal ratio of heat to coals and it burns with even heat for long periods, making it the best choice for stoves and other heating systems. It can be burnt with little smoke, although it does produce a moderate amount of ashes. When it burns, it produces very little odor and is not irritating to the eyes. It tends to burn quickly and can be difficult to start when green.

    White Oak

    White oak is a very dense wood, which means that you don’t need as much of it when burning as you would with another type of firewood. It produces a lot of heat and a moderate amount of coal. It burns slower than most other types of wood, but it doesn’t produce many ashes or sparks. White oak is best used in fires that will be burning for long periods.

    Red Oak

    Despite being very hard, red oak burns well.

    It produces a good amount of heat and it is one firewood that tends to burn longer than other woods.

    It doesn’t produce a lot of ash or smoke, which is good for people with allergies and makes it one of the best wood for fireplace no smoke.

    It’s also a great choice for open fires and fireplaces, as it doesn’t require constant attention. Red oak wood can be difficult to light when green, but once it gets going it burns exceptionally well.

    Black Locust

    Black Locust is by far one of the best wood species to burn in a fireplace or stove. It has great burning characteristics, produces very little creosote, and leaves very little ash. While it’s known as one of the best firewood types around, it can be hard to find sometimes. Black Locust comes from North America, but it is becoming less common in forests due to logging and overcutting.

    Eastern White Pine

    Eastern white pine is a less dense, lower quality wood than most other types of firewood. If you have trouble finding straight wood or have a lot of firewood, this wood could suit your needs. It burns with a moderate amount of heat and produces very little ash or coals. There is little smoke produced by this type of firewood when burning, making it suitable for people with respiratory problems.

    Common Hackberry

    Hackberry wood burns slowly and is said to be easy to start. However, it isn’t as easy to find and doesn’t produce a great amount of heat. It produces little ash or coals but can be a great choice for people who have respiratory problems. This wood burns fast once it gets going, but it does leave a lot of ash and sparks.

    Ponderosa Pine

    This wood is very popular because of its huge, expansive knots. The wood from these trees tends to last for hours when burning in your fireplace, and the pleasant scent it gives off makes it a favorite among people who like the smell of a crackling fire. The main drawback is that it is hard to split and can cost more than other types of wood.

    Eastern Red Cedar

    This wood burns slower than most other hardwoods, which makes it ideal for those who want to burn their wood over a long period. The wood also smells great while burning, and the cedar aroma can last for hours. This type of wood also produces very little ash, making cleaning up after your fire very easy.

    Western Red Cedar

    Western Red Cedar wood is high quality. It produces a lot of heat and coals, but it doesn’t produce a lot of ashes or smoke when burning. It burns slowly, which is great for those who want their fire to last an extended period. Western Red Cedar also produces very little ash or sparks.

    Which firewood has least smoke?

    The truth is that it depends on how well seasoned it is. Smoke is often caused by moisture in the wood. If the wood is properly seasoned, it should produce very little smoke. If you go with one of the varieties in the list above, you should find that smoke is not a problem – provided it has been seasoned well.

    What is the worst wood for fireplace use?

    In our opinion, the worst wood to use in your fireplace would have to be of the Laburnum variety. This is because it makes a lot of thick smoke for only a very small fire. It really is recommended that you don’t use it.

    Conclusion

    So now you know what’s the best firewood for a fireplace – If you’re looking for great firewood for your fireplace, you’ll want to pick the type of wood that suits your needs the best.

    If you go out and buy the wrong type of wood, you could end up with a burnt pile of ash. Make sure that you know what kind of wood you need before heading out to cover any ground.

  • How to Make a Battle Axe Out of Wood – 7 Simple Steps

    How to Make a Battle Axe Out of Wood – 7 Simple Steps

    I was watching a movie last week that had a battle using axes, it was brutal!

    The lead character had to make his own battle axe using only the timber available to him.

    It got me wondering, would it be possible to figure out how to make a battle axe out of wood. I mean, the bigger question is How do you make a battle AXE?

    How to Make a Battle Axe Out of Wood

    You can make your own battle axe with wooden components with just some basic tools and materials, so it’s something that nearly anyone can do at home.

    In this article, we’ll give you the steps to follow and tips for making your own battle axe out of wood, so you can craft one of your own at home in no time!

    How to make Gimlis Battle-Axe out of wood! – Free templates

    How to Make a Wooden Axe in Real Life

    Learning how to make a battle axe out of wood – What You Need

    All you need for making a battle axe is wood and some tools. The first step is getting pieces of wood for your weapon. While hardwood such as oak or maple works best, softwoods like poplar are also viable options. You can even use plywood if you don’t have access to stronger materials.

    Regardless of what type of wood you choose, be sure it’s not treated in any way, as chemicals will damage your axe.

    Step 1- Gather Wood

    Although most battle axes are forged from iron, you can make one out of wood. Gather some scrap pieces of hardwood and shape them into an axe head. Cut a thick piece about four inches wide and about three feet long. Then carve it down on both sides so that it’s flat on both ends. This will be your axe head.

    Make sure you find another board about two inches in diameter—the handle—and use a hand saw to carefully cut it into six-inch-long segments. If you don’t have access to power tools, consider using a knife or hatchet instead; just know that it might take longer. Remember, too, if your handle is thicker than two inches it may not fit well on your blade.

    Step 2 – Cut the Wood

    Use your handsaw to cut two hardwood logs into 6-inch sections.

    These will be your axe’s blades. Next, use your handsaw and a framing square (or ruler) to fashion straight lines on each side of each blade that are 2 inches in from each end, dividing them into six equal parts.

    (A framing square has a 90-degree edge that can help you draw perfectly straight lines.)

    Set these aside for now.

    Step 3 – Shape the Blade

    If you want to know how to make a battle axe out of wood, you need to start with hardwood, such as oak or hickory. Round out one end of your wood log until it resembles an axe head.

    You’ll need hardwood for your handle too; ash is ideal because it’s both strong and lightweight. Split one end off and shape each piece into an axe handle until they fit together smoothly.

    Once you’ve cut all your pieces, join them together with iron nails or wooden pegs.

    Step 4 – Shape the Hilt

    The hardest part about making a battle axe is shaping and rounding off the grip for your hand. It’s imperative that you make it fit perfectly, as not only will you be holding onto it during use, but it can also become easily slippery when covered in (fake) blood.

    There are many ways to shape wood, including using an axe or a chainsaw; however, if you have neither of these at home (or work), then you’ll need something stronger than an old butter knife.

    Step 5 – Assemble It All Together

    After you have everything cut and sanded, assemble your battle axe. It’s as simple as drilling two holes on either side of each piece and slotting them together with wood glue.

    For added strength, make sure your wood pieces are not warped. You might need to put some heavy things on top while it dries overnight—but once it’s dried and assembled properly, you’ll be able to wield it in style.

    Step 6 – Finish It off with Leather and Fittings

    If you have several oak logs, and you’re determined to make one big battle axe, you can do so. You’ll need three heavy-duty leather belts (1 1/2 inches or wider), 8-10 inches long.

    Overlap two leather belts and lash them together with 2 foot segments of 3/8 inch dowel. This is your hilt; set it aside for now.

    Step 7 – A Final Coat of Paint?

    Once you’ve sanded your axe, wipe it down with some turpentine and give it a good coat of linseed oil. Linseed oil will make your wood shiny, but it also has benefits that go beyond aesthetics.

    It gives wood resistance to wear and tear while improving its tensile strength—otherwise known as its ability to bend without breaking.

    And that is How to make a battle axe out of wood!

    How to Make a Axe with Cardboard

    If this is all too much, you could think about making an axe out of cardboard. It will take a little time, but totally worth the effort. If you don’t need it to last through the weather or a LARP fight, a cardboard option could be a great one.

    Watch the video below to learn how to create your own:

    How to Make a DIY Viking Axe
  • How to Sharpen Log Splitter Wedge

    How to Sharpen Log Splitter Wedge

    Last week I was using my log splitter wedge and I noticed that each split was taking longer and longer. After a quick inspection, I found that the wedge had blunted down quite a bit and wasn’t splitting quite like it used to. Sometimes it would even bounce off the wood.

    Once I’d finished sharpening the wedge, I said to myself –

    ‘I can’t be the only one with this problem’

    – Me

    So here we are, an article with specific instructions on how to sharpen log splitter wedge.

    Over time, all log splitter wedges will lose their sharpness. You will have to re-sharpen them – it’s just the way it is.

    Only after sharpening them will you get back to the original efficiency of the wedge.

    So, How to sharpen log splitter wedge?

    How to Sharpen Log Splitter Wedge
    Sledgehammer and a wedge splitting a birch log

    While the procedure to sharpen the log splitter wedge is easy, you will need a handful of things for the same. You have to 1st procure them before following the steps we will cover below.

    Things you’ll need:

    • Your blunted log splitting wedge
    • A coarse metal file
    • A fine metal file

    How to sharpen log splitter wedge by hand

    Step 1: Examine the wedge:

    Very first thing is to examine the wedge. You are specifically looking for cracks. If there are cracks in the blade, you cannot use that blade again. You shouldn’t sharpen that blade either as replacement is the only real safe option.

    If you do need to replace your wedge, heres the on we recommend because it is made in the USA and is a high quality product, if not, feel free to skip down the page to the sharpening instructions:

    Step 2: Use a COARSE Metal file:

    Over time, the edges of the blade might rollover. You have to deal with these edges using a coarse file. For the sides as well, you will also have to use the coarse file.

    Step 3: Start at the sides:

    First start with the sides of the wedge. This will help you refine the sides and slowly move towards the tip. When you move towards the tip, you will encounter the rolled edges and since the file move against them, straightening them is easy.

    Step 4: Use a FINE metal file:

    The splitting point or the tip of the blades should be filed with the fine metal file. However, you have to ensure that the tip is properly filed from both sides. Only then can you evenly split the logs.

    Using these four simple steps, you can easily sharpen the log splitter wedge.

    If you’re looking for a decent metal file to sharpen your wedge, we recommend this one:

    What are the advantages of a sharp log splitter wedge?

    Sure enough, you’re taking a lot of effort to sharpen the log splitter but do you know the same advantages?

    We will cover those below.

    1. Easy to split:

    When the blades of the log splitter wedge are sharp, the logs are easy to split. Moreover, you can split them into the required size. That way, you will not have to perform the splitting operation on pieces of the same log repeatedly. The result is ready to use log pieces right away.

    1. Can handle logs in bulk:

    When the log splitter wedge is sharp, you can handle a lot of logs in a single day. It will save you time and increase your efficiency.

    You might have noticed that we are dealing with files and blades in the process. That is why undertaking certain safety precautions is a necessity.

    Precautions to take while sharpening log splitter wedge:

    The two safety precautions you need to stick to include:

    1. Use safety gear:

    While dealing with the wedge of blades and the files, you should always wear safety gloves and an eye mask. That way, you are less prone to suffering a cut.

    1. File both sides:

    Many people are in a hurry to use the wedge.

    They do not pay proper attention to both sides. Merely filing a single side of the tip is of no use. It means that the shape of the tip will be different on one side.

    When that happens, there are chances that the log might be of uneven shape. Even more, the log might move swiftly to one side because of the shape of the tip. In that case, the chances of an accident increase manifold.

    To avoid this, simply file the tip on both sides. That way, you will no longer have to worry about uneven cutting off logs or any injury.

    What is the best splitting wedge sharpening angle?

    If it’s a hardwood like oak or maple, then you should use a 45 degree angle. If it’s a softwood like pine or cedar, then you should use a 30 degree angle.

    How do I know when to sharpen my Splitting Maul?

    Easy! The giveaway is simply when your splitting maul bounces off wood when you try and split it. You can also tell just by looking at it, or ‘gently’ running your finger across the blade.

    Should I sharpen a log splitter wedge?

    Yes, absolutely. It’s very important to keep your log splitter wedge sharp so that it is safe to use.

    How do you sharpen a wood splitter axe?

    You sharpen a wood splitter axe in much the same way that you sharpen the wedge above. However, you can also use a grinder to perform the task also.

    Should I sharpen my splitting axe?

    Yes, if you’re asking the question, there is a good chance that your axe is blunt and could be a potential safety risk. If your axe bounces off the wood you are trying to split, it is worth either getting out the metal files, or using the bench grinder to give it a good maintenance sharpen.

    Conclusion:

    Sharpening a log splitter wedge isn’t a difficult task. However, you need to pay proper attention while doing so. Simply follow the guide above, and you will never have an issue with sharpening a log splitter wedge again.

  • How to Split Wood by Hand in 3 Simple Steps!

    How to Split Wood by Hand in 3 Simple Steps!

    Learning how to split wood by hand certainly has its advantages. You will be able to split it into the size which you want. However, many homeowners aren’t aware of how to split wood by hand?

    If you are one of them, our guide today can undoubtedly help you.

    Things you will need for splitting wood by hand:

    • Splitting Maul
    • Axe
    • Wooden block

    How to split larger wood pieces?

    If you need wooden pieces bigger than 8 inches, the technique we will highlight now is better.

    Step one: Using the maul:

    You will need a maul to cut larger pieces, and you have to start low. You have to use your body weight to bring the maul down when you’re swinging it.

    Step two: Use the power of your core:

    When you swing the maul, you have to keep your core strong. Your legs should be wider than the shoulder, and you should be slightly bent. This will allow you to bring the maul down with precision.

    Step three: Cutting the wood further:

    When you bring the maul down in such a way, the wooden pieces are likely to be broken into two. However, that does not mean you will get wooden pieces of the exact size you want. To achieve that size, you need to chop the two pieces into smaller ones again.

    You must use the same technique as highlighted above.

    With the help of this technique, it is easier for you to get even-sized wooden pieces.

    How to split smaller wood pieces?

    For the smaller wooden pieces, you have to use an axe. That is because the edge of the axe is sharper, and also you will be able to cut the wood into smaller pieces precisely.

    While using the axe, the only thing which you have to ensure is that you hit the wood at the right spot. When you do that, the wood will split easily.

    If you use limited power, the blade can be stuck as well. In that case, you will have to bring the axe down again at the same spot.

    If the axe is stuck in wood, you have to get the axe out and hit the piece of wood on the wooden block. Doing so will separate them both. After that, once again, you can try to cut the wood into smaller pieces.

    You can easily split wood by hand using these two techniques whether you need smaller pieces or larger pieces. There are, however, a few additional steps you need to follow:

    Additional tips to split wood by hand:

    Once you follow these steps, it becomes easy for you to split the wood efficiently.

    1. Go with a chopping block:

    While splitting wood by hand, it is a good idea to always use a chopping block. With the help of a chopping block, cutting the wood is easy, and you will not have to bend that low either. That is why; the chances of suffering from back pain are low.

    2. Sandwich the logs:

    If you want to cut the wood precisely, it is better to use chopping blocks. You should sandwich the logs between these two blocks. Also, the ground on which you keep the blocks and the logs should be soft. In that case, it becomes easier for you to split the wood.

    By sandwiching the logs, you will be able to precisely bring down the axe or the maul. That way, you will not have to worry about splitting the same piece again and again.

    3. Use a tire:

    In addition to a wooden block, you can also use a tire. With the help of a tire, you will get a higher height which ensures that you do not have to bend so much to cut the logs. The reduction in bending means not having to worry about back pain.

    4. Some pieces won’t split:

    Irrespective of the tools you are using, some pieces will simply not split. They require machine work. That is why, if even after your best effort, the wooden pieces are not splitting, you might have to use an electric log splitter in that case.

    Once you follow these steps, the task of splitting wood by hand is indeed easy.

    If you’re looking for the exact technique, you can follow the steps highlighted above. Doing so will certainly ensure that you can split wood into proper dimensions without trying again and again.

  • How to Maintain a Log Splitter – 7 Steps to Save Time and Money

    How to Maintain a Log Splitter – 7 Steps to Save Time and Money

    Without properly maintaining a log splitter, it will not work very well. Its efficiency will keep on reducing. That is why maintenance is a necessity rather than optional.

    The question is, how to maintain a log splitter?

    We will share a step-by-step guide below, which will help you know more about the maintenance steps.

    1. Inspect the user manual:

    Most manuals of the log splitters come along with the troubleshooting as well as a maintenance procedure. When you want to conduct maintenance, the first thing you need to do is to check the manual. Once you do so, it becomes really easy for you to know the steps you need to undertake.

    If you do not have the user manual handy on do not want to go through it, you can follow the steps below.

    2. Check the hoses:

    The first thing you must do is check the hoses.

    These usually connect the ram cylinder with the reservoir. If there is any problem with the hydraulic fluid or hydraulic reservoir leaking, the problem is most likely to be the hose. That is why you have to first look at the hose.

    If you find the leakage or a cut in the hose, it is better to replace the hose altogether.

    That way, you can preserve the hydraulic fluid and prevent any leaks.

    3. Refill the hydraulic fluid:

    During the maintenance, it is also necessary to check the hydraulic fluid reservoir. You have to replace the hydraulic fluid at least once a year.

    However, rather than using any hydraulic fluid stored earlier, it is good to use fresh hydraulic fluid. That will undoubtedly increase the log splitter’s efficiency and ensure that the wear and tear is reduced significantly.

    4. Lubricate the moving parts:

    Lubrication is an essential aspect of the log splitter. If the moving parts are not lubricated, it will become difficult for you to use the splitter.

    That is why, when it comes to parts like ram, you have to ensure that they are fully lubricated. During the maintenance, you have to grease every inch of the ram to ensure that it operates smoothly.

    If you notice any rust on the ram, you have to eliminate that rust with a proper cleaning procedure.

    5. Inspect the engine:

    Engine maintenance is equally important when looking after your log splitter. Firstly, you have to check the engine oil. The engine oil levels should be full. If they are low, you might have to add some engine oil to them.

    Additionally, you have to look at the carburetor as well. There shouldn’t be any residue from the carburetor. Apart from that, look at things like the spark plug and the electrodes. If you notice any residue on the same, you have to clean the same.

    If you aren’t sure how to eliminate the residue, the manual can undoubtedly come to your rescue.

    6. Check the pull cord:

    Pull cord often suffers from a lot of wear and tear over time. It can fray out if you have been using the log splitter for years now. If it breaks down, you will not be able to turn on the log splitter.

    To avoid this problem, you must observe the pull cord during maintenance. If you notice any wear and tear, you will have to replace the pull cord.

    There is no use in repairing it. Replacing is a much better option.

    7. Check the pump:

    In the last, check the pump itself. If any parts of the pump, like the central spindle, are loose, you have to work on fixing that. Loose parts can decrease the pump’s efficiency and might break down the log splitter as well.

    When checking the central spindle and other parts of the pump, make sure that you look at the bearings as well. The bearings should not be loose, and if they are worn out, they should be replaced. If the condition of bearings is proper, you have to lubricate them.

    In these seven simple steps, you can maintain a log splitter and increase its efficiency and lifespan. Rather than spending a lot of money by hiring a professional, simply follow this handy guide, and you shouldn’t have any problems with your log splitter.

  • Husqvarna vs Echo – A Chainsaw Showdown

    Husqvarna vs Echo – A Chainsaw Showdown

    Husqvarna vs Echo Chainsaws – Which is the Better Choice?

    Husqvarna vs Echo - A Chainsaw Showdown

    The Husqvarna is a popular choice for many people wanting to buy a chainsaw.

    The main reason for this is brand recognition as they have been around for over 125 years, with their first-ever chainsaw being manufactured in 1903. Husqvarna is one of the most trusted brands in the industry when it comes to chainsaws – making them a great choice, regardless of experience with chainsaws.

    Echo Chainsaws are also very popular.

    They are often used by professionals but are also available in different sizes for different needs and budgets. Echo has been in the industry for over 40 years and there is no sign of them slowing down their production any time soon.

    They make great chainsaws as well, but are they better than Husqvarna?

    Generally speaking, Husqvarna is known to produce higher-end products – in comparison with Echo, and therefore carry a higher price point because of this.

    Some people may find this out of their budget range, but you can get some great deals on Husqvarna for home use too!

    Lets make some comparisons – Husqvarna vs Echo Chainsaws

    Below are the two chainsaws we will be comparing in this article. They have been chosen as they are the most similar in terms of engine size and saw design.

    Echo CS400

    The Echo CS400 is light enough to use all day long, yet solid enough to handle any workload you can throw at it.

    When you’re using this saw in the winter, or when temperatures are below 5 degrees there is a is plug in the housing you can shift to deal with the cold.

    And as the day warms up, move the plug back and keep going.

    • The CS400 has a large capacity point .41 Litre fuel tank.
    • Has a .28 Litre bar and chain oil tank
    • No tool required – easy access – to the spark plug and air filter
    • Front spiked bumper
    • Throttle lock-out on top of the handle
    • Easy to access on off switch
    • Large capacity primer
    • Anti-vibration handle.
    • Adjusting the chain is pretty straightforward. There are two nuts to loosen then turn one screw to make the adjustment – easy!

    Husqvarna 435

    The Husqvarna 435 chainsaw is another great option – this competition is a tough one!

    With a 40.9cc engine and weighing 4.4kg. This allows for fast and efficient cutting of branches and trees.

    The 435 has an adjustable chain tensioning system that makes it easier to maintain the chain. It also has a low kickback bar that reduces the risk of injury

    Power output 2.2 hp Power output 1.6 kW

    • Smart Start® – The engine and starter have been designed so the machine starts quickly with minimum effort. Resistance in the starter cord is reduced by up to 40%.
    • Weight (excl. cutting equipment) 4.4 kg Lubricant Oil tank volume 0.25 l
    • Recommended bar length, min-max 13-18 in Bar length (inch) 16 in Chain type SP33G

    Here are some of the tech specs spoken about on the Husqvarna website.

    • Power output 1.6 kW
    • Cylinder displacement 40.9 cm³
    • Maximum power speed 9000 rpm Idling speed 2900 rpm
    • Clutch engagement speed (±120) 4300 rpm
    • Fuel consumption 652 g/kWh
    • Electrode gap 0.5 mm
    • Ignition module air gap 0.3 mm
    • Oil pump type Fixed flow Exhaust emissions (CO2 EU V) 813 g/kWh

    There’s two simple features that I really appreciate about this model:

    1. Simple replacement and cleaning of the air filter – can be removed very simply and replaced.
    2. To make your felling super accurate they have put a ‘felling line’ on the body of this model meaning you won’t be off at all.

    Our Thoughts

    So there you have it, that is the specs for the Husqvarna vs Echo showdown. If you’re still finding it confusing making a decision solely based on the specs of the two saws, I think the key thing to weigh up is whether you want to invest in a very well known brand in Husqvarna, or rather what we believe to be a ‘younger’ yet very sturdy competitor.

    I have been in your shoes.

    My decision was to go with the Echo model. It has been great, and servicing has been very simple. I would highly recommend it, however I think you would be satisfied with either of these two options.